

Table of Contents
New Relic is an APM software that monitors application performance and sends notifications if it finds any glitches. APM reveals what is happening deep in your code with end to end transaction tracing and a variety of color-coded charts and reports.
This blog will show you how to set up New Relic in Magento 2.
Step 1: Sign Up for a New Relic Account
- Go to the New Relic website and sign up for an account.
- Complete the information as directed. When suggested, select the product that you want to set first.
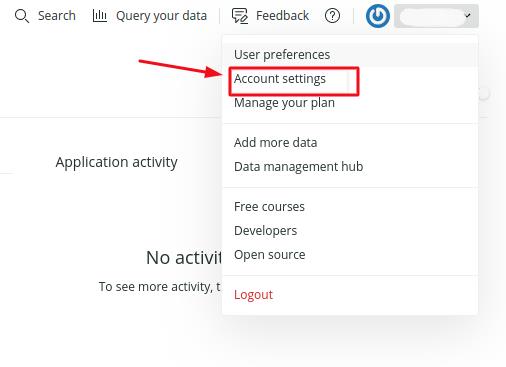
- While you are in your account, locate the following credentials that you will need to complete the configuration:
- Account ID: On the New Relic account dashboard, the Account ID is the number in the URL after: /accounts
- Application ID: On the New Relic account dashboard, click APM. Then select Application and select your application. The Application ID is the number in the URL after: /applications/
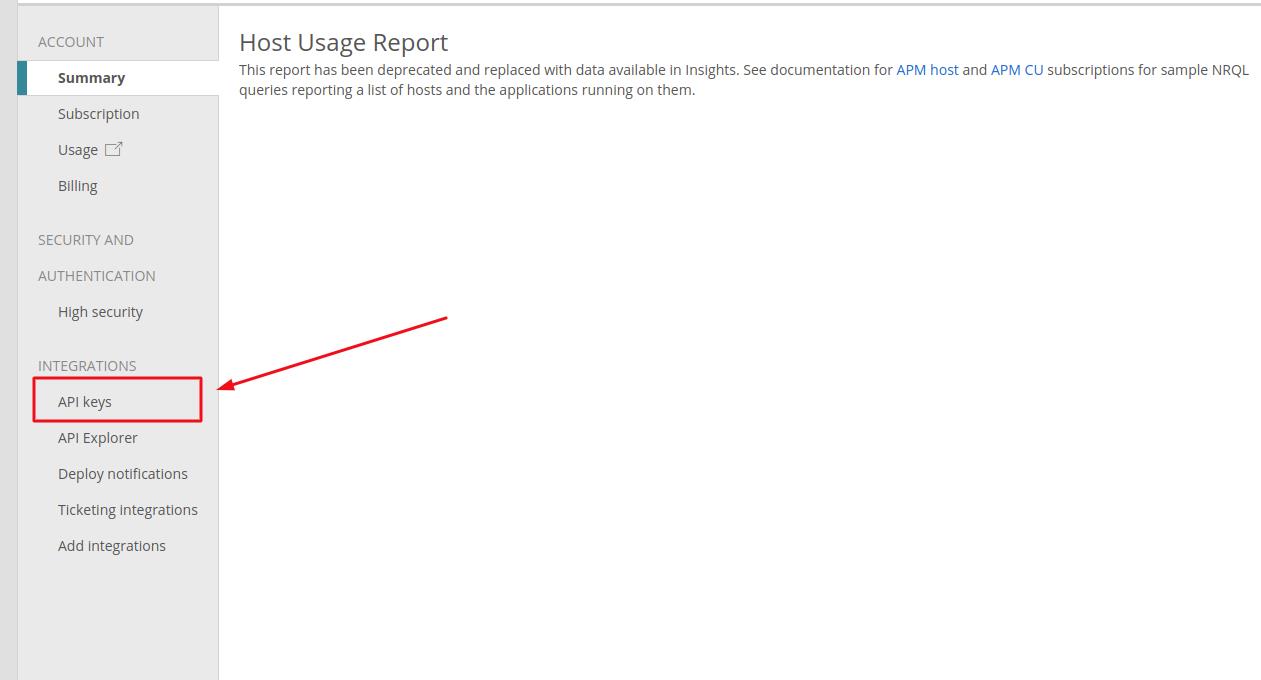
- New Relic API Key: On the New Relic account dashboard, select Account Settings. Then click API Keys in the panel on the left below Integrations. You can create a new API key, restore or delete your API key on this page.
- Insights API Key: On the New Relic account dashboard, select Insights. in the panel on the left below Administration, select API Keys. Your Insights API Key(s) display on this page. To create a key, select the plus sign (+) next to Insert Keys
Step 2: Install the New Relic Agent on Your Server
To gather and transmit data using New Relic APM Pro, you have to install the PHP agent on your server.
- After selecting a web agent, click PHP.
- Follow the instructions. See New Relic for PHP if you need help
- Make sure that cron is running on your server. Read Configure and run cron in Magento 2 if you need help.
Step 3: Configure Your Store
From the Admin sidebar, choose Stores. Below Settings, select Configuration
In the options table on the left below General, click New Relic Reporting and continue with following:
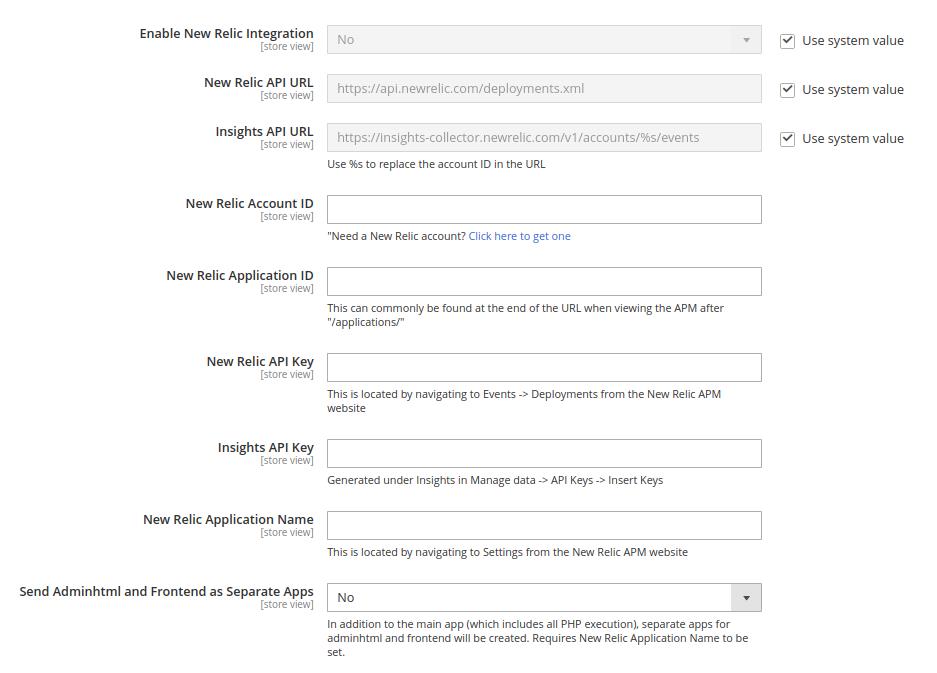
Set Enable New Relic Integration to “Yes”
- In the Insights API URL, replace the percent (% symbol with your New Relic Account ID)
- Input all required information: Account ID, Application ID, API Key, Insights API Key.
- In the New Relic Application Name field, enter a name to identify the configuration for internal reference.
- (Optional) For the Send Adminhtml and Frontend as Separate Apps field, select Yes to send collected data for the storefront and Admin as separate apps to New Relic. This option requires a name entered for the New Relic Application Name.
- Save Config.
Step 4: Enable Cron for New Relic Reporting

- Expand the Cron section
- Set Enable Cron to ”Yes” and click Save Config.
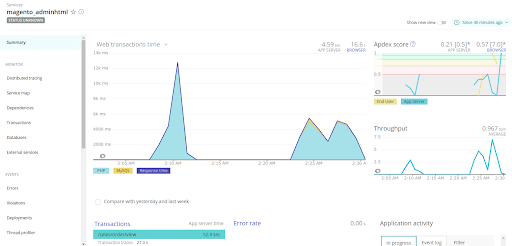
From now, you will be able to track web transaction time, MySQL queries, and key transactions, and you could have code-level visibility performance tracking that allowed you to analyze your code, database queries, errors, and similar.
On the APM Application page, use the New Relic APM Overview to view information about your application

Lucy Pham
Marketing Manager


Weekly Trending
-

Confirmation code: 5 things you need to know about it
March 30 2021 -

How to create a message queue in Magento 2
July 28 2020 -

How to add products to cart programmatically
December 14 2023 -

How to login as customer in Magento 2 - A Step-by-Step Guide
September 21 2020

Recent Posts
-

11 Best Magento 2 Social Login Extensions Free and Paid 2024
January 27 2024 -

Payment Gateway Comparison - Top 5 Providers in 2024
January 21 2024 -

6+ Voice Search Statistics and Trends You Can't Miss in 2024
January 20 2024 -

2024 Hottest Trend: Voice Search Technology
January 16 2024 -

Salesforce - No.1 CRM Platform for Magento In 2024
January 14 2024


Regarding your question, you still need to install relic agent on Magento Cloud. You can refer to this link for installation guidelines.