What is an SSL Certificate?
SSL stands for Secure Sockets Layer and, in short, it's the standard technology for keeping an internet connection secure and safeguarding any sensitive data that is being sent between two systems, preventing criminals from reading and modifying any information transferred, including potential personal details.
The two systems can be a server and a client (for example, a shopping website and browser) or server to server (for example, an application with personally identifiable information or with payroll information).
TLS/SSL works by using a combination of a public certificate and a private key. The SSL key is kept secret on the server. It is used to encrypt content sent to clients. The SSL certificate is publicly shared with anyone requesting the content. It can be used to decrypt the content signed by the associated SSL key.
In this article, we will show you how to create a self-signed key and certificate on your server and local.
Get the certificate and key files
Real domain
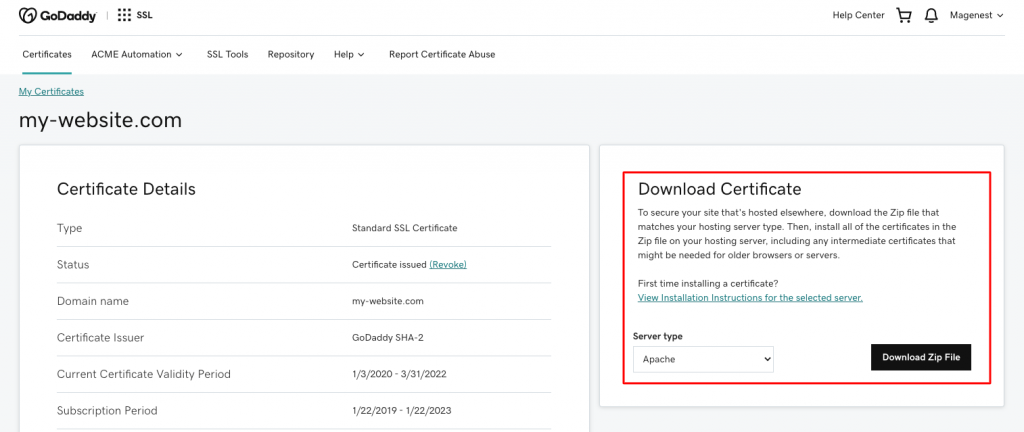
After purchasing the certificate, you will be able to download all the necessary files. Here is an example with GoDaddy:

Virtualhost
To create a self-signed key and certificate in local, first you need to install certutil and mkcert:
Install Certutil
To install mkcert on any Ubuntu or Debian system, first, install Certutil dependencies:
$ apt install libnss3-tools -y
Installing Mkcert
Mkcert is a simple tool for making locally-trusted development certificates. It requires no configuration.
$ wget https://github.com/FiloSottile/mkcert/releases/download/v1.1.2/mkcert-v1.1.2-linux-amd64
$ mv mkcert-v1.1.2-linux-amd64 mkcert
$ chmod +x mkcert
$ cp mkcert /usr/local/bin/
Now that the mkcert is installed, we run the command below to create your local CA.
$ mkcert -install
Created a new local CA at "/home/magenest/.local/share/mkcert" ?
The local CA is now installed in the system trust store! The local CA is now installed in the Firefox and/or Chrome/Chromium trust store (requires browser restart)! ?
To check the path local CA, we run the command:
$ mkcert -CAROOT
/home/magenest/.local/share/mkcert
Generate Local SSL Certificates
$ sudo mkcert magenest.local.com '*.local.com' localhost 127.0.0.1 ::1
Using the local CA at "/home/magenest/.local/share/mkcert"

Created a new certificate valid for the following names ?
 - "magenest.local.com"
 - "*.local.com"
 - "localhost"
 - "127.0.0.1"
 - "::1"

The certificate is at "./magenest.local.com+4.pem" and the key at "./magenest.local.com+4-key.pem"
After run the above command self-signed key and certificate is placed in /home/magenest/.local/share/mkcert
Enable the Certificates for the Apache Web Server
To configure Apache to use these certificates, edit the default ssl configuration file, /etc/apache2/sites-enabled/magenest.conf and change the SSL certificate and key file to point to the locally generated cert and key file above. See the example below.
$ vim /etc/apache2/sites-enabled/magenest.conf
<VirtualHost *:443>
        ServerName magenest.local.com
        DocumentRoot /var/www/html/magenest/
        SSLEngine on
        SSLCertificateFile "/home/magenest/.local/share/mkcert/magenest.local.com+3.pem"
        SSLCertificateKeyFile "/home/magenest/.local/share/mkcert/magenest.local.com+3-key.pem"
        <Directory /var/www/html/magenest/>
            Options Indexes FollowSymLinks MultiViews
            AllowOverride All
            Order allow,deny
            allow from all
    </Directory>
</VirtualHost>
Reload and restart Apache to activate the new configuration
$ systemctl reload apache2
$ systemctl restart apache
Enable the Certificates for Nginx Web Server
$ vim /etc/nginx/sites-enabled/magenest.conf
upstream magenest {
     server  unix:/run/php/php7.4-fpm.sock;
 }
 server {
     listen 443;
     server_name magenest.local.com;
     ssl on;
     ssl_certificate /home/magenest/.local/share/mkcert/magenest.local.com+3.pem;
     ssl_certificate_key /home/magenest/.local/share/mkcert/magenest.local.com+3-key.pem;
     set $MAGE_ROOT /var/www/html/magenest;
     include /var/www/html/magenest/nginx.conf.sample;
 }
Verify that the configuration
$ nginx -t
nginx: the configuration file /etc/nginx/nginx.conf syntax is ok
nginx: configuration file /etc/nginx/nginx.conf test is successful
Reload Nginx
$ sudo service nginx reload
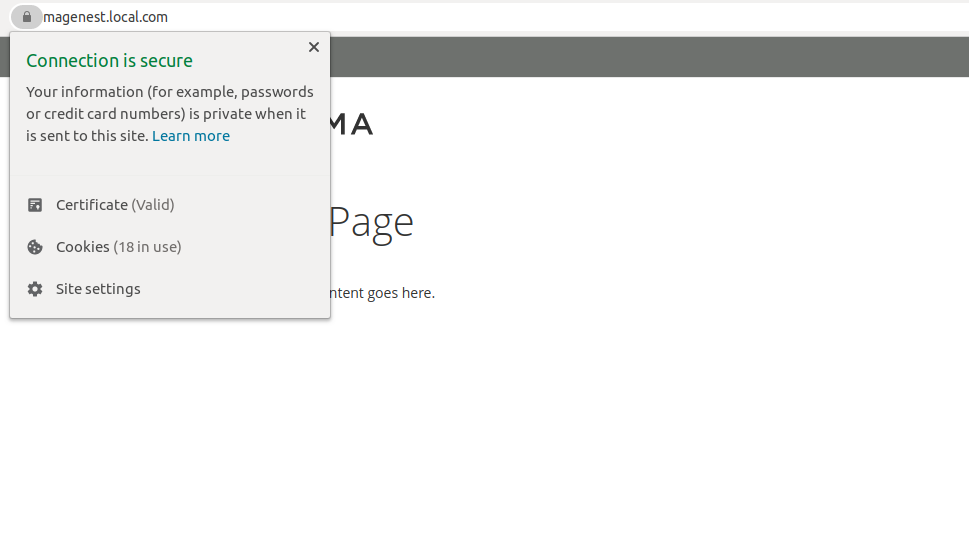
After setup you proceed to https://magenest.local.com/. If successful, you will see the below image.

We at Magenest hope that you can find the answers for your questions in our blog today. If you still have something unclear, please drop a comment down in this blog.


