

Table of Contents
There are many ways to add fields to the Customer Address Form in the backend and frontend pages. Today We will show you a simple way to add fields to the Customer Address Form in Magento 2.
Backend Page
If you want to add a new script to the existing module, you have to create an upgrade script. The following steps describe the procedure to create an upgrade script that adds a customer attribute.
Step 1: Create a file app/code/Magenest/Address/Setup/UpgradeData.php with the following content
<?php

namespace Magenest\Address\Setup;

use Magento\Framework\Setup\ModuleContextInterface;
use Magento\Framework\Setup\ModuleDataSetupInterface;
use Magento\Framework\Setup\UpgradeDataInterface;

class UpgradeData implements UpgradeDataInterface
{
   private $customerSetupFactory;

   public function __construct(\Magento\Customer\Setup\CustomerSetupFactory $customerSetupFactory)
   {
       $this->customerSetupFactory = $customerSetupFactory;
   }

   public function upgrade(ModuleDataSetupInterface $setup, ModuleContextInterface $context)
   {
       $customerSetup = $this->customerSetupFactory->create(['setup' => $setup]);
       if (version_compare($context->getVersion(), '1.0.1') < 0) {
           $customerSetup->addAttribute('customer_address', 'new_field', [
               'label' => 'New Field',
               'input' => 'text',
               'type' => \Magento\Framework\DB\Ddl\Table::TYPE_TEXT,
               'source' => '',
               'required' => false,
               'position' => 90,
               'visible' => true,
               'system' => false,
               'is_used_in_grid' => false,
               'is_visible_in_grid' => false,
               'is_filterable_in_grid' => false,
               'is_searchable_in_grid' => false,
               'frontend_input' => 'hidden',
               'backend' => ''
           ]);

              $attribute=$customerSetup->getEavConfig()
                ->getAttribute('customer_address','new_field')
                ->addData(['used_in_forms' => [
                   'adminhtml_customer_address',
                   'adminhtml_customer',
                   'customer_address_edit',
                   'customer_register_address',
                   'customer_address',
                  ]
                ]);
           $attribute->save();
       }
   }
}
Step 2: This script will run for version 1.0.1 so you have to configure your module to that version. You can do this by raising the version number in the file app/code/Magenest/Address/etc/module.xml in the setup_version attribute. The file will have the following content
<?xml version="1.0" ?>
<config xmlns:xsi="http://www.w3.org/2001/XMLSchema-instance"
       xsi:noNamespaceSchemaLocation="urn:magento:framework:Module/etc/module.xsd">
    <module name="Magenest_Address" setup_version="1.0.1">
    </module>
</config>
- Step 3: To run the script, we have to run the same command
php bin/magento setup:upgrade.
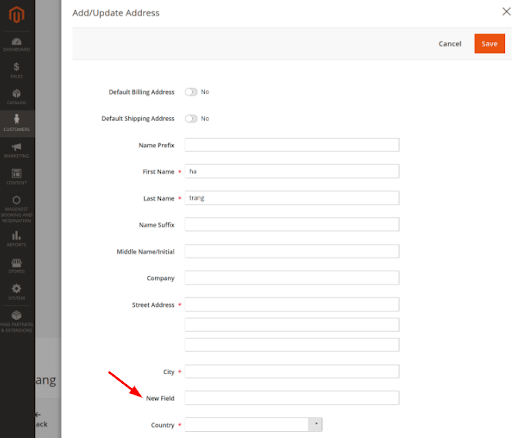
When the upgrade script has finished, go to the Admin and look at the page Customers > All Customers > Add New Address > Address
Frontend page
Step 1: Create a template file address/edit.phtml in app/code/Magenest/Address/view/frontend/templates
Step 2: You need to change file customer_address_form.xml in Customer_Module. So, you must create a file with the same name in app/code/Magenest/Address/view/frontend/layout and add the following content to it:
<?xml version="1.0"?>
<page xmlns:xsi="http://www.w3.org/2001/XMLSchema-instance"
     xsi:noNamespaceSchemaLocation="urn:magento:framework:View/Layout/etc/page_configuration.xsd">
   <body>
       <referenceBlock name="customer_address_edit" >
           <action method="setTemplate">
              <argument name="template"xsi:type="string">
               Magenest_Address::address/edit.phtml</argument>
           </action>
       </referenceBlock>
   </body>
</page>
Step 3: Open the file edit.phtml in vendor/magento/module-customer/view/frontend/templates and copy the content to app/code/Magenest/Address/view/frontend/templates/address/edit.phtml.
Step 4: Now, to add a custom field, you must place the following content between the <fieldset class="fieldset"> tag and the </fieldset> tag.
<div class="field">
   <label class="label" for="new_field">New Field Address</label>
   <input type="text" name="new_field"/>
</div>
When you have done, clear cache to apply the changes. This is the result
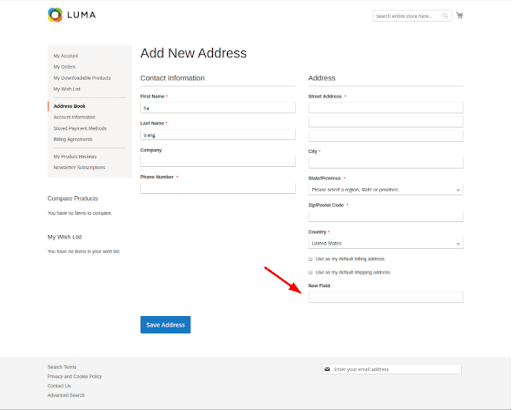
Fill in the information and click Save Address
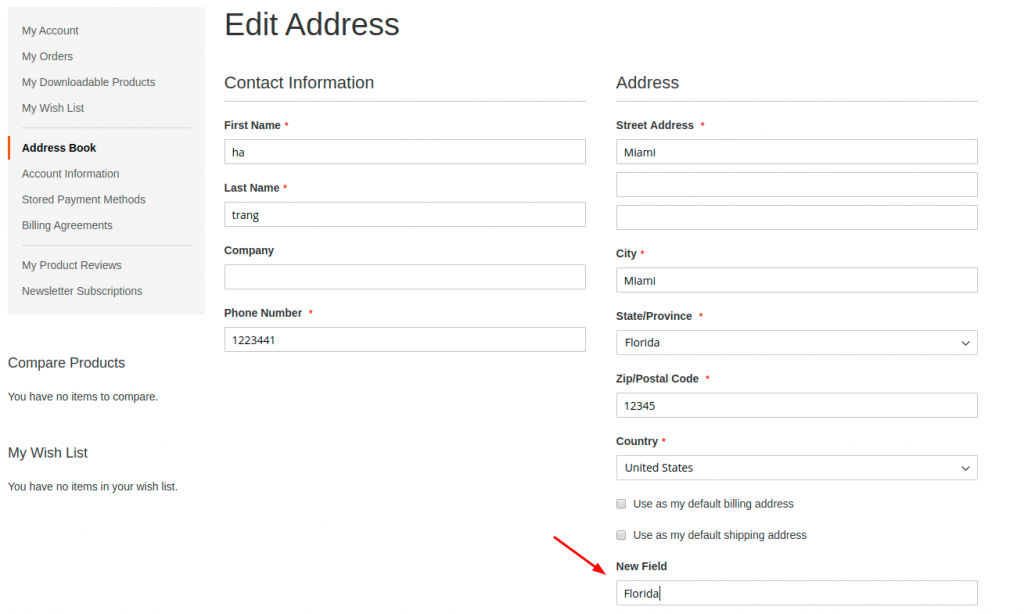
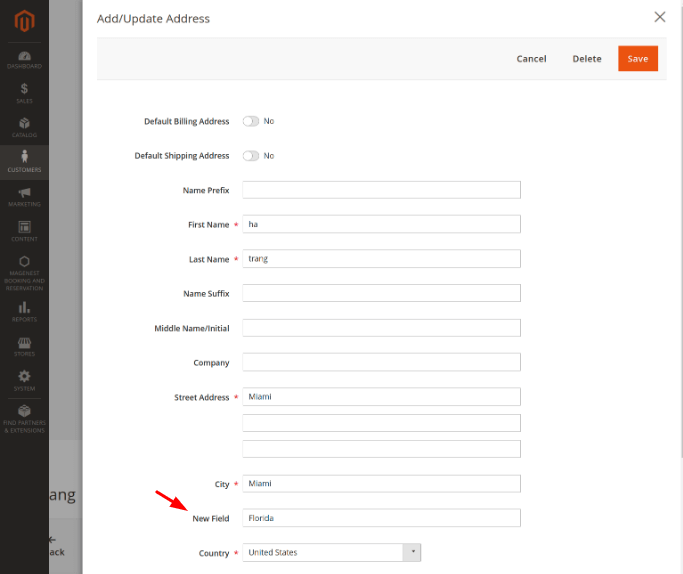
Then go to the Admin and look at the page Customers > All Customers and select edit in Customer Grid. Go to the Address tab and select edit in Address Grid, you can see the newly added information in the frontend.
Happy coding!

Joel Pham
Joel Pham is the CEO of Magenest, with extensive experience in eCommerce, business operations, and digital transformation. He has led projects for major brands across Magento, Shopify, Odoo, and enterprise technology solutions.


Weekly Trending
-

Magento 2 UI Components - How to get & set data (with Examples)
September 6 2019 -

Top 7 Best Payment Gateway in Malaysia - What Are They?
November 10 2021


Recent Posts
-

Payment Gateway Comparison - Top 5 Providers in 2026
April 1 2026 -

Magento 2 Stripe Extension: Installation & Configuration
December 29 2025 -
5 Best-selling Magento 2 Extensions to check out before 2026
December 19 2025 -

8 Best Magento Subscription Extensions For Online Businesses
December 8 2025 -

How to set up payment methods in Stripe Payment Gateway
September 21 2025


thanks
can you help me with this?
First of all, Thanks for this clearly tutorial. I have doubt about how to set this input but now in Shipping Address at checkout area. Would you be nice to teach me :D
Cheers!
Thanks for shearing
I see a bit different the aproach to the use of attribute factory but i can see that in magento core it is used this way.
Do you know how to add a boolean instead of a text ?
Step 4 in this tutorial did not pre-populate the value on the frontend (shows up fine in the backend) , after it was entered and saved.
To load the value on frontend, this is what I did in the edit.phtml file:
New Field Address
<input type="text" name="new_field"
value="escapeHtmlAttr($block->getAddress()->getCustomAttributes()['new_field']->getValue()) ?>"/>
Thank you for the very generous share!
darthRez
.