

Table of Contents
Uploading files is a popular process that every developer will face up with when working with UI Form. Although it is popular, this process is quite trickier than it seems. So in today's tech guide article from Magenest, we will guide you step by step on how to create an image uploader in Magento 2 UI Form.
Steps to create an image uploader in UI Form
Step 1: Add field UI Form
Let’s add a field in your UI form XML file to render the image uploader. Please note that you will need to define formElement, elementTmpl, previewTmpl, uploaderConfig config as below to make sure the image uploader could be shown correctly.
<field name="logo">
   <argument name="data" xsi:type="array">
       <item name="config" xsi:type="array">
           <item name="dataType" xsi:type="string">string</item>
           <item name="label" xsi:type="string" translate="true">Logo</item>
           <item name="formElement" xsi:type="string">fileUploader</item>
           <item name="elementTmpl" xsi:type="string">ui/form/element/uploader/uploader</item>
           <item name="previewTmpl" xsi:type="string">ui/form/element/uploader/preview</item>
           <item name="sortOrder" xsi:type="number">10</item>
           <item name="required" xsi:type="boolean">true</item>
           <item name="allowedExtensions" xsi:type="string">jpg jpeg gif png svg</item>
           <item name="uploaderConfig" xsi:type="array">
               <item name="url" xsi:type="url" path="magenest_upload/index/upload"/>
           </item>
           <item name="notice" xsi:type="string"><![CDATA[Allowed file types:jpg, jpeg, png.]]></item>
       </item>
   </argument>
</field>
Step 2: Create an ImageUploader model
Create a model ImageUploader to handle your uploading logic such as create file in temp directory from request body , copy file from temp directory to the destination folder.
Magenest / ImageUpload / Model / ImageUploader
<?php


namespace Magenest\ImageUpload\Model;


...

class ImageUploader extends \Magento\Catalog\Model\ImageUploader {
public function __construct(
   Database $coreFileStorageDatabase,
   Filesystem $filesystem,
   UploaderFactory $uploaderFactory,
   StoreManagerInterface $storeManager,
   LoggerInterface $logger, $baseTmpPath,
   $basePath,
   $allowedExtensions,
   $allowedMimeTypes = [],
   Name $fileNameLookup = null)
{
   parent::__construct($coreFileStorageDatabase, $filesystem, $uploaderFactory, $storeManager, $logger, $baseTmpPath, $basePath, $allowedExtensions, $allowedMimeTypes, $fileNameLookup);
}

//todo: for later logic override use

...
}
Step 3: Create controller upload image
When you upload the image, the controller will respond to move your image to the destination directory using the ImageUploader model.
Magenest / ImageUpload / Controller / Adminhtml / Index / Upload
   public function __construct(
       Context $context,
       \Magenest\ImageUpload\Model\ImageUploader $imageUploader
   ){
       $this->imageUploader = $imageUploader;
       parent::__construct($context);
   }

   public function execute()
   {
       $imageId = $this->_request->getParam('param_name', 'image');

       try {
           $result = $this->imageUploader->saveFileToTmpDir($imageId);
       } catch (Exception $e) {
           $result = ['error' => $e->getMessage(), 'errorcode' => $e->getCode()];
       }
       return $this->resultFactory->create(ResultFactory::TYPE_JSON)->setData($result);
   }
Step 4: Using dependency injection to config ImageUploader and Upload controller constructor
Now add your configuration in di.xml. These configurations include upload base path and upload base temp path for image upload. Type name will be your upload controller.
Now adding the configuration in Magenest / ImageUpload / etc / di.xml
<type name="Magenest\ImageUpload\TestImageUpload">
   <arguments>
       <argument name="baseTmpPath" xsi:type="string">test/tmp</argument>
       <argument name="basePath" xsi:type="string">test</argument>
   </arguments>
</type>
Checking the result
If all steps have been done, please clear the cache and view your UI form to view the result.
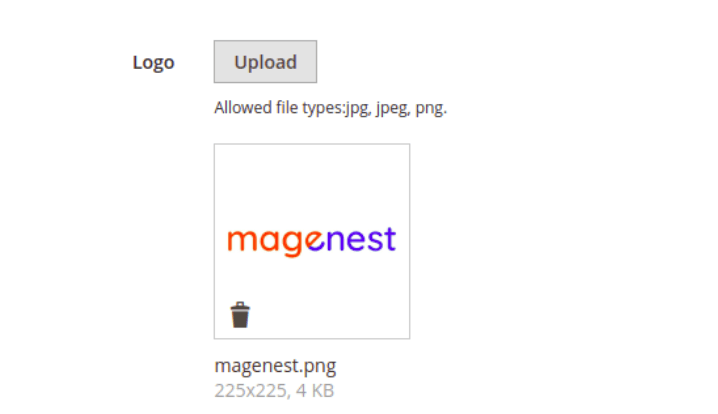
Now clients could upload images to the files system. However, to move the image from tmpl folder to desired folder as well as saving files path for further processing, you will need to add some script on action save of UI Form:
Magenest / ImageUpload / Controller / Adminhtml / Index / Save
if ($data)
{
           if (isset($data['logo'][0]['name']) && isset($data['logo'][0]['tmp_name'])) {
               $data['image'] =$data['logo'][0]['name'];
               /** @var \Magenest\ImageUpload\Model\ImageUploader $this->imageUploader */
               $this->imageUploader->moveFileFromTmp($data['image']);
           } elseif (isset($data['logo'][0]['image']) && !isset($data['logo'][0]['tmp_name'])) {
               $data['image'] = $data['logo'][0]['image'];
           } else {
               $data['image'] = null;
           }
}
Conclusion
This is the end of our tech guide article on how to create an image uploader in Magento 2 UI Form. We hope that our guide has covered the answers to your problems with this process. If you have questions about other tech issues, check out our tech guide section or drop us your questions here.

Joel Pham
Joel Pham is the CEO of Magenest, with extensive experience in eCommerce, business operations, and digital transformation. He has led projects for major brands across Magento, Shopify, Odoo, and enterprise technology solutions.


Weekly Trending
-

Customer Journey Map: Definition, Templates, and Examples
November 9 2020 -

Confirmation code: 5 things you need to know about it
March 30 2021 -

Which is the Top 8 Best Payment Gateway in India?
December 10 2023 -

How to Set Up QuickBooks Payroll Successfully?
March 16 2023

Recent Posts
-

Payment Gateway Comparison - Top 5 Providers in 2026
April 1 2026 -

Magento 2 Stripe Extension: Installation & Configuration
December 29 2025 -
5 Best-selling Magento 2 Extensions to check out before 2026
December 19 2025 -

8 Best Magento Subscription Extensions For Online Businesses
December 8 2025 -

How to set up payment methods in Stripe Payment Gateway
September 21 2025

