

Table of Contents
In this article, we will go through the steps to create swatches for products on Magento 2 using a built-in product attribute management system.
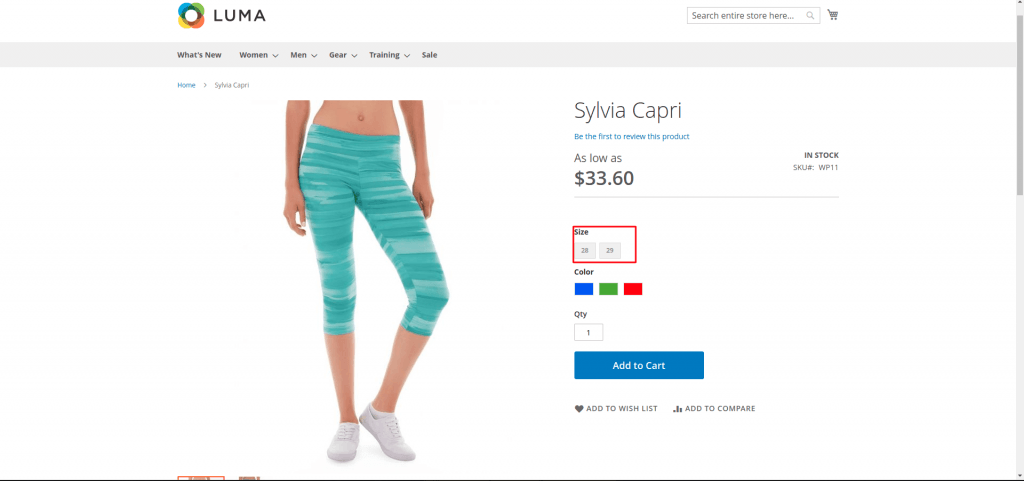
Magento supports color swatches and text-based swatches. Options not available for selection are either crossed out or blurred.
Configure swatches in Magento 2
To create swatches, go to Admin > Stores > Attributes > Product, click Add New Attribute.
Complete basic properties
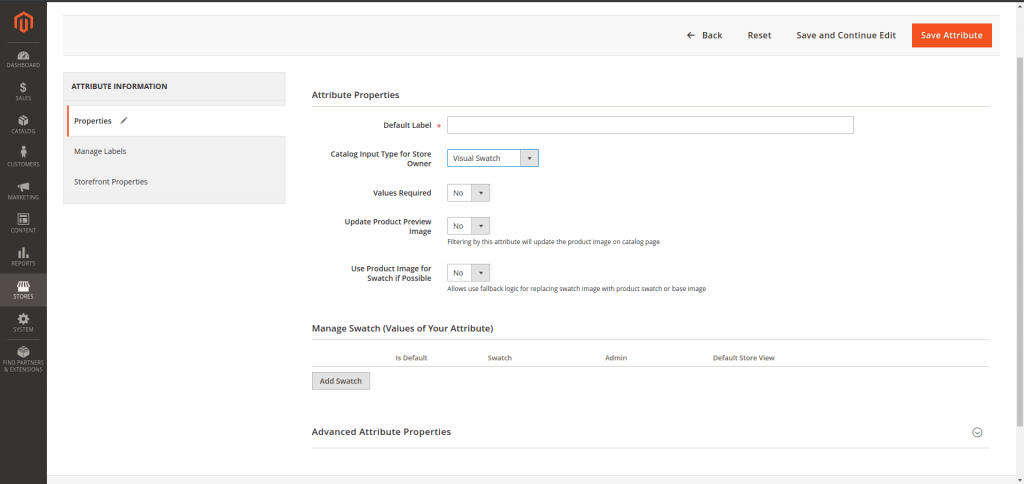
Insert the Default Label to describe the attribute.
In the Catalog Input Type for Store Owner, choose the type is text swatch or visual swatch.
- With text swatch
- Under Manage Swatch, click the Add Swatch.
- Name for the first value that is shown in the list, simultaneously, you can name the value under Admin and different values for each store view when you have multiple store views. If there is only one store view, the Admin value is auto-applied for the storefront.
- Click Add Swatch and do the above guides again for the next swatches.
- Mark the Is Default checkbox if you want to use it as the default.

- With visual swatch:
- Under Manage Swatch, click the Add Swatch.
- Choose a color or upload a file for the swatch.
- Default Store View is the name of a swatch when shown on the frontend.
- Click Add Swatch and do the above guides again for the next swatches.
- Mark the Is Default checkbox if you want to use it as the default.
Choose Yes for the Value Required to ask customers to select the options before purchasing.
Choose Yes for the Update Product Preview Image to update the product image on the catalog page and product page when choosing different swatches.
With visual swatch choose Yes for Use Product Image for Swatch if Possible to allows use fallback logic for replacing swatch image with product swatch or base image.
Complete the Advanced Properties (Optional)

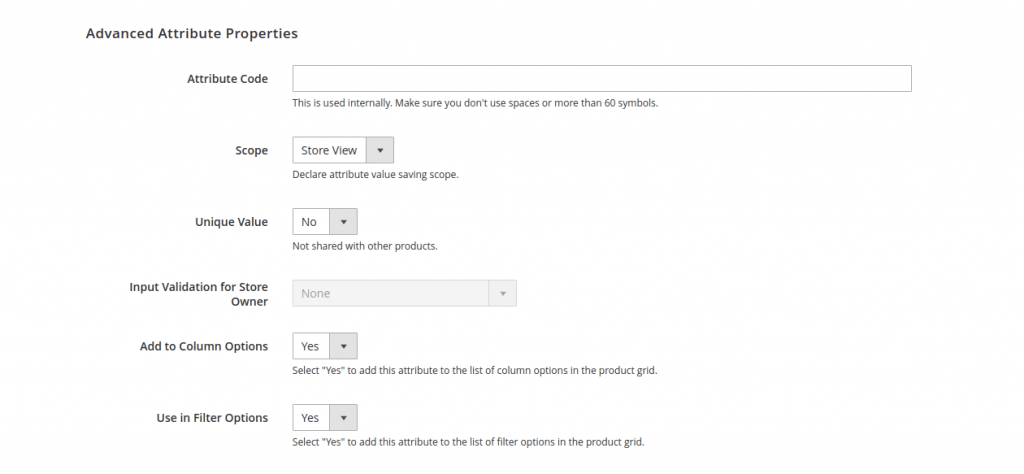
- Insert the Attribute code less than 60 symbols and don’t use spaces.
- The Scope includes Store View, Website, and Global. You will choose one of three places in your store system where the appearance of the attribute is approved.
- Apply the Unique Value if you don’t want to share it with other products.
- Choose Yes for Add to Column Options to add this attribute to the list of column options in the product grid.
- Choose Yes for Use in Filter Options to add this attribute to the list of filter options in the product grid.
Manage Labels section
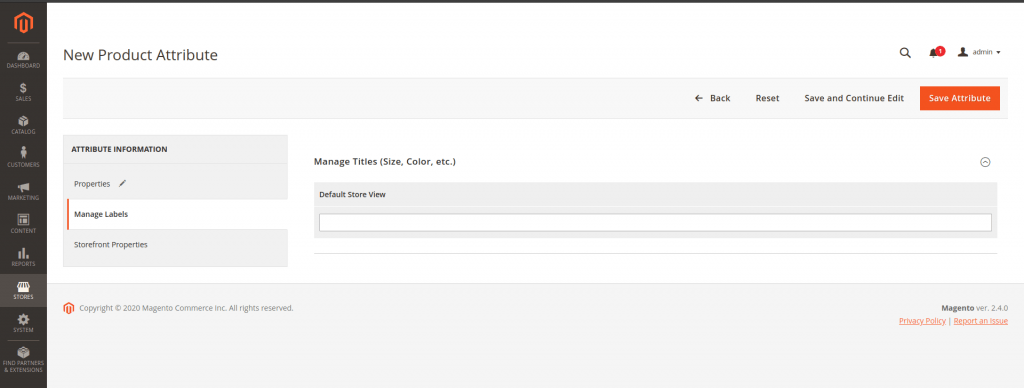
Insert the Title that is shown for the field label. In case of multiple languages supported on your store, insert the translation of the title for each view.
Storefront Properties
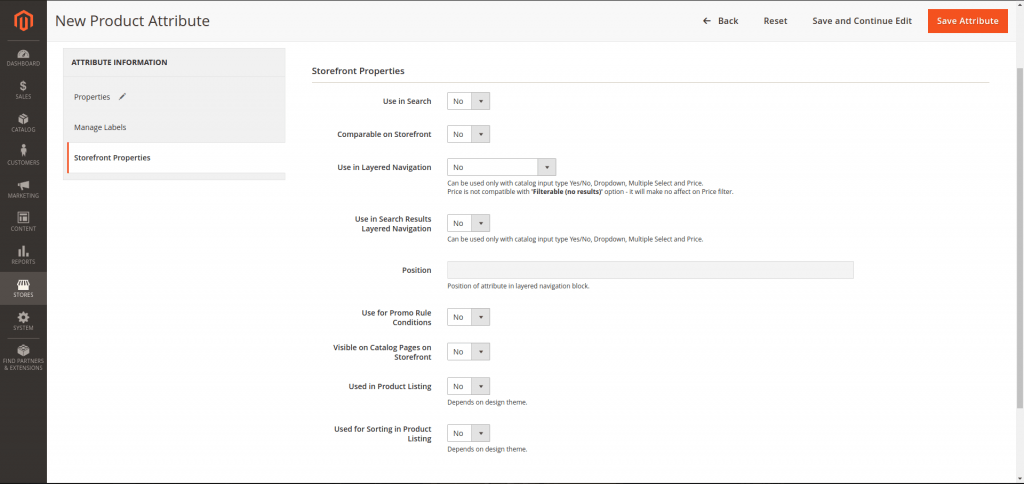
- Choose Yes for the Use in Search to be ready for searching the attribute.
- Allow comparing the product attributes in Product Compare if you choose Yes in the Comparable on Storefront field.
- Choose Yes in the Use for Promo Rule Conditions field to apply the product attribute for the price rules.
- To make the attribute visible in the catalog page listing, choose Yes in the Visible on Catalog Pages on Storefront field.
- If Product Listing is supported at your store, the attribute can be appeared and used as a sort parameter. Configuring that from the Used in Product Listing and Used for Sorting in Product Listing field.
- Save Attribute to finish all.
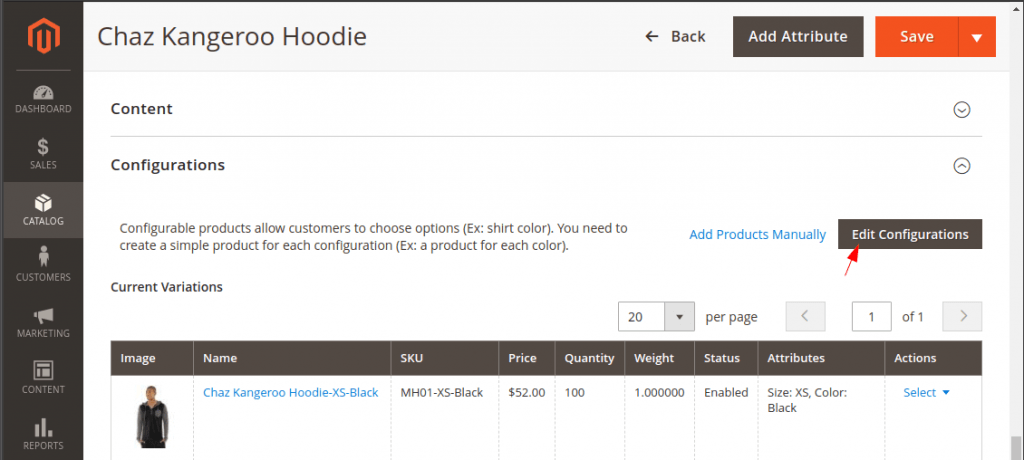
Update the product
On the admin sidebar, choose Catalog > Product and select a configurable product.
In the Configurations section, click Edit Configurations.
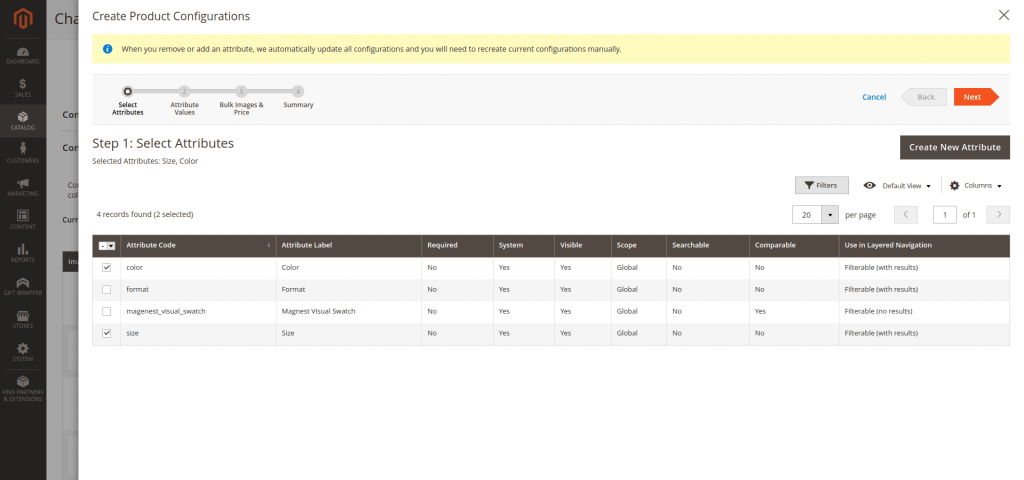
Choose attributes you want to be added to the configurable product, then click Next.
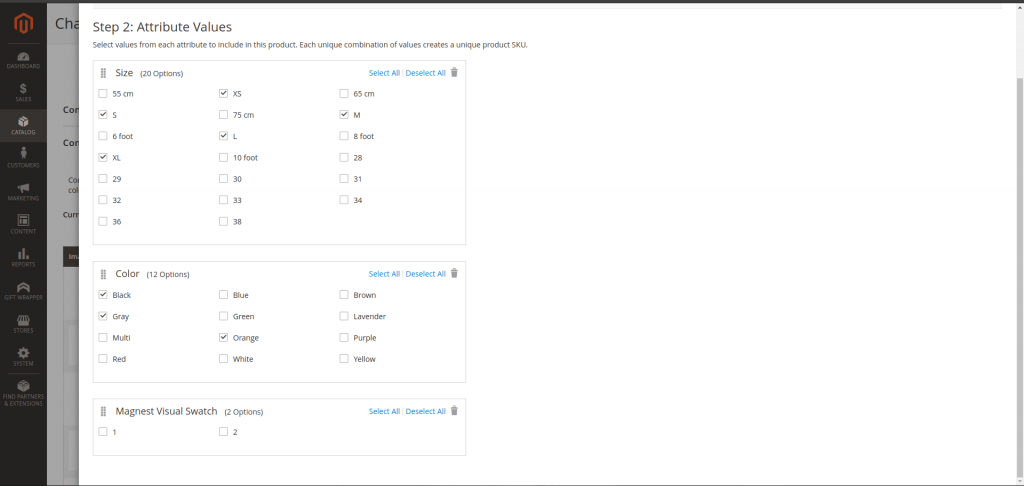
Then, choose attribute values.
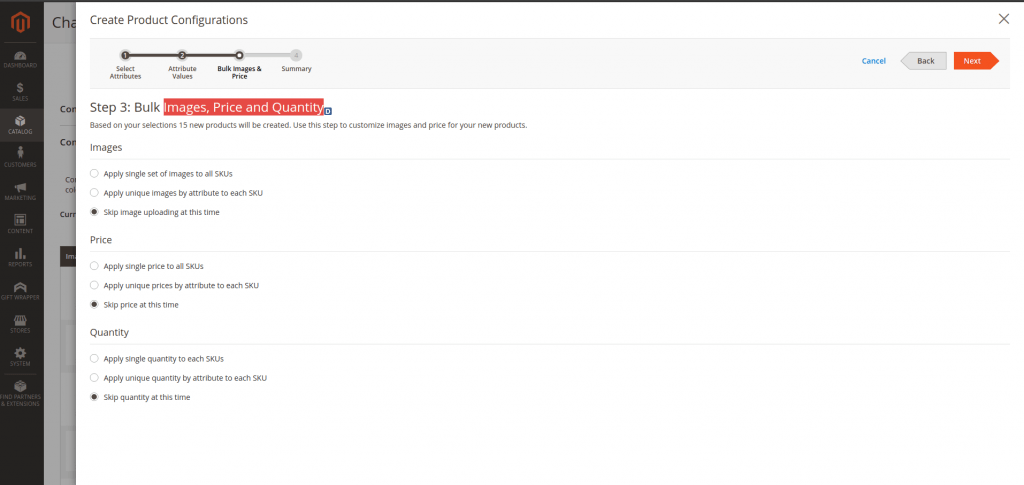
Next, choose options for Images, Price and Quantity.
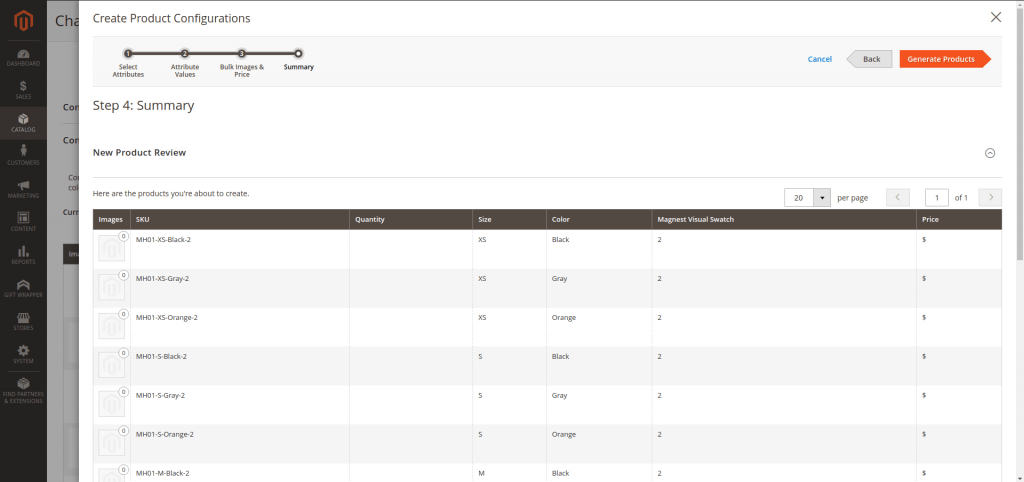
Next, you will show all new products, in there click Generate Product.
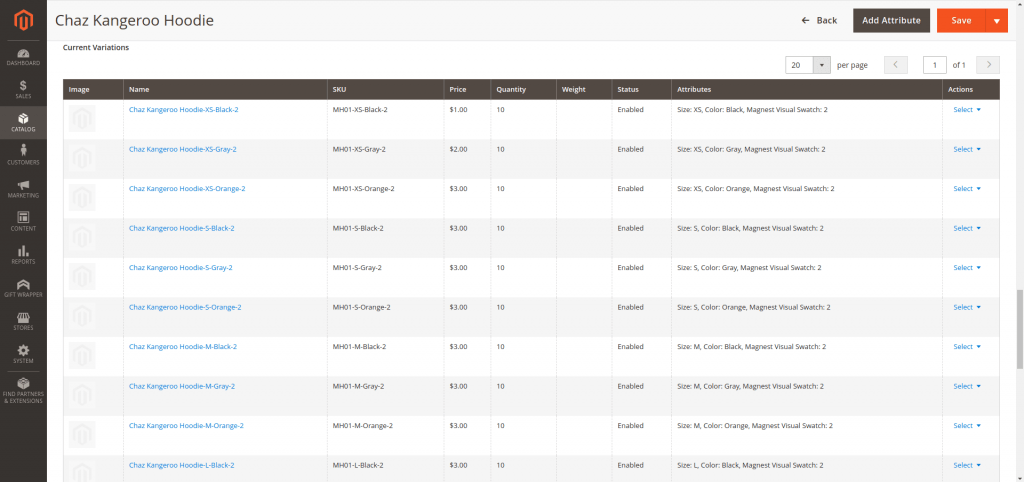
Set price and quantity, then click Save.

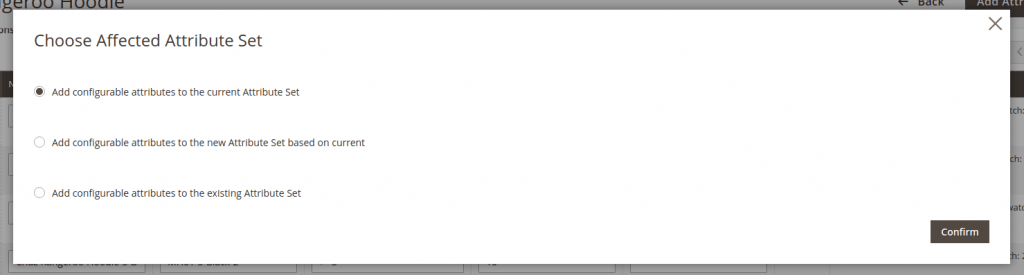
Choose Affected Attribute Set then click Confirm.
Finally, flush cache then reload the edit page and see the result.
Visit our blog to update latest news about Magento 2: click here

Joel Pham
Joel Pham is the CEO of Magenest, with extensive experience in eCommerce, business operations, and digital transformation. He has led projects for major brands across Magento, Shopify, Odoo, and enterprise technology solutions.


Weekly Trending
-

Customer Journey Map: Definition, Templates, and Examples
November 9 2020 -

Confirmation code: 5 things you need to know about it
March 30 2021 -

Which is the Top 8 Best Payment Gateway in India?
December 10 2023 -

Best Store Locator Page Examples: Sell online & offline smarter
November 22 2019 -

How credit card processing works: What you should know?
November 18 2021
Recent Posts
-

Payment Gateway Comparison - Top 5 Providers in 2026
April 1 2026 -

Magento 2 Stripe Extension: Installation & Configuration
December 29 2025 -
5 Best-selling Magento 2 Extensions to check out before 2026
December 19 2025 -

8 Best Magento Subscription Extensions For Online Businesses
December 8 2025 -

How to set up payment methods in Stripe Payment Gateway
September 21 2025

