An Introduction to QuickBooks
What Do Businesses Need to Include in QuickBooks?
How To Set Up QuickBooks Payroll?
Nowadays, QuickBooks is a powerful tool that has been used by millions of small businesses to help them handle their accounting tasks. If you are one of them and you are looking for ways to use this software option effectively, then this article is for you because we would introduce to you a complete guide on how to set up QuickBooks payroll.
An Introduction to QuickBooks
No matter what the case is, QuickBooks has been considered a leader in the industry thanks to its feature-packed software to help businesses balance the books, track their expenses, and pay their staff.
And of course one of the most outstanding features of QuickBooks is its payroll. This software allows your business to have a quick and easy paying process for your employees on time for each pay period and not only that, at the same time it provides additional helpful functions to your company such as calculating the payroll taxes and filling in tax forms.
Unfortunately, the price of your license or monthly subscription fee for QuickBooks Desktop doesn’t include payroll. It will cost users an additional fee for an add-on QuickBooks Payroll feature. Depending on the plan you opt for, you will have to pay from 29 to 109 dollars a month plus an additional fee of 2 dollars per employee (based on your chosen plan, it’s either per paycheck or per month). However, the good news is that you can experience a 30-day trial for free before making any long-term commitment.
Once you finish signing up for a subscription with QuickBooks Payroll, it can be easily accessed through your QuickBooks Desktop dashboard without any download required. This way you can start setting up and processing your payroll within a few minutes.
In this article, we will introduce to you how to set up QuickBooks payroll step by step as well as help you gather proper documentation to do business payroll successfully.
First, let’s get started with what kind of elements you need to run in QuickBooks.
What Do Businesses Need to Include in QuickBooks?
Before you even start with the software, you need to gather the necessary information and documents to make the process of setting up QuickBooks payroll become as quick and easy as possible. Then later on in this article, we will walk you through every step to make sure you know how to set up QuickBooks payroll smoothly.
- Form W-4s: You need a completed and signed W-4s form of each employee.
- Basic employee information: basic information for each employee, including their legal name, birthday, address, hire date, and termination date.
- Pay rates: Enter the employees’ wage in the section: “How much do you pay your employees?” and input the default number of their working hours in a day or a week.
- Pay schedule: Specify a pay schedule for your staff by going to the “How often do you pay employees” section and choose the “create pay schedule” button.
- Deductions: You should know the type of deduction and the number of certain deductions in case your employees have them. Some common types of paycheck deductions are wage garnishments, health insurance premiums, and retirement accounts.
How To Set Up QuickBooks Payroll?
Sometimes it can get a bit confusing for those who want to know how to set up QuickBooks payroll but below would be a step-by-step payroll set up to walk you through it effortlessly.
If you are not confident about running your own payroll, you can always practice using a sample company to practice and test it out as we used in this guidance.
You can follow these basic steps below whether you are using a sample or your company file.
Step 1: Open QuickBooks Payroll Set Up
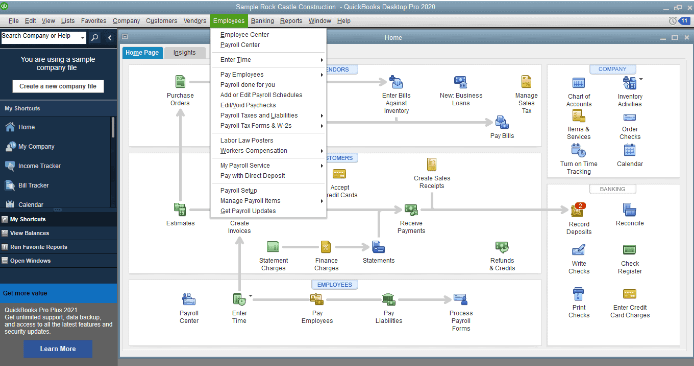
After gathering all your information, it’s time to get started with the first step, which is opening the QuickBooks payroll setup tool. This could be done by clicking on “Employee” at the top bar on your QuickBooks screen, then choose “Payroll Center” in the dropdown menu and look for the “Payroll Setup” option.
Step 2: Set up Compensation
When you have opened the Payroll Setup tool, the very first thing to do is enter and confirm information related to your company’s compensation and benefits.
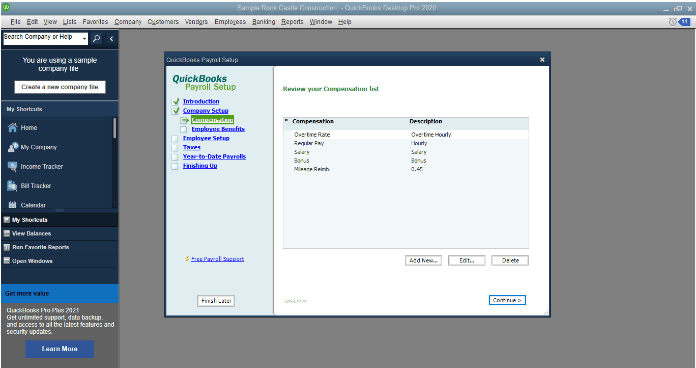
There are several options for compensation that your business can consider using, including:
- Overtime Rate: The paying for employees from working overtime
- Regular Pay: The amount of money that employees get per hour
- Salary: This is used for staff that receive a salary every month
- Bonus: Bonus payments for employees
- Mileage Reimbursement: This would be used if you reimburse your staff for miles driven.
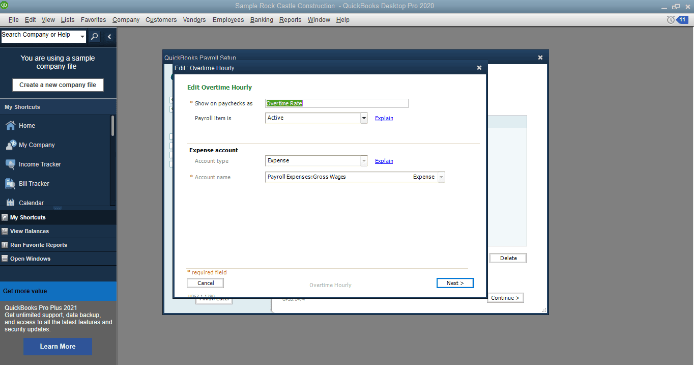
There are three options in this menu but you can delete any compensation type if your company doesn’t use it and at the same add additional compensation that is on your lists. A great thing is you can choose to edit entries and change what kinds of compensation are shown on paychecks, select the account type, make the payroll item active or inactive, and change the account name.
Step 3: Set Up Employee Benefits
The third step is to add and edit benefits provided for your employees. You also need to add pay options (like cash advances or mileage reimbursements) and deductions (such as wage garnishments).
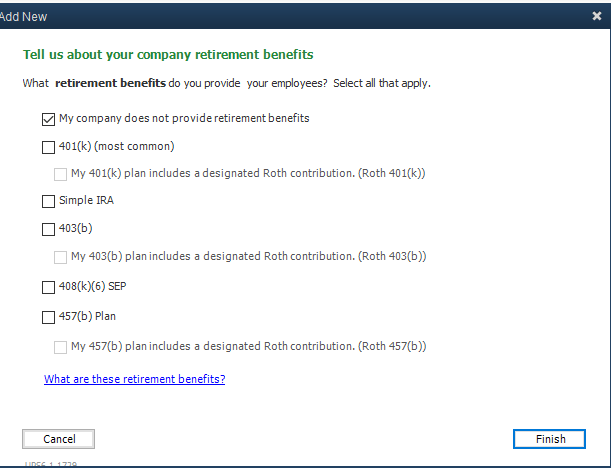
When you have added all of your compensation, additions, benefits, and deductions, it’s about time to add the numbers for each employee.
Step 4: Set Up Employees
Remember all the documents and information we remind you to repair earlier? Now would be the time to make good use of them.
Personal information
To set up a new employee, start by the “Add new” button and fill in all the required information including legal name, birthday, gender, employee type, contact information, hire date.
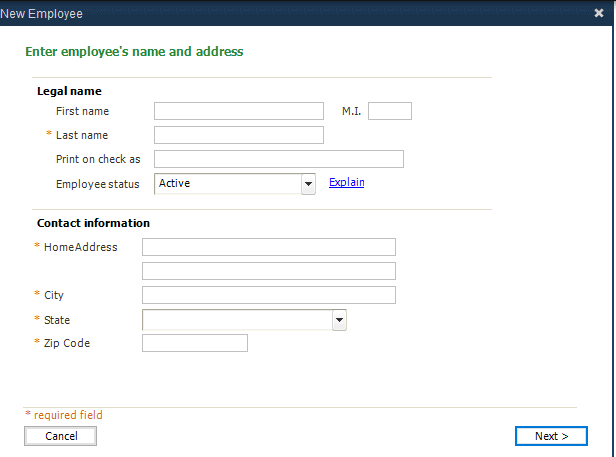
Pay Rates and Schedules
Next, you will need to fill in the pay rates and working schedules of employees. Don’t forget to sell overtime rates, a bonus, health insurance costs, or mileage reimbursement.
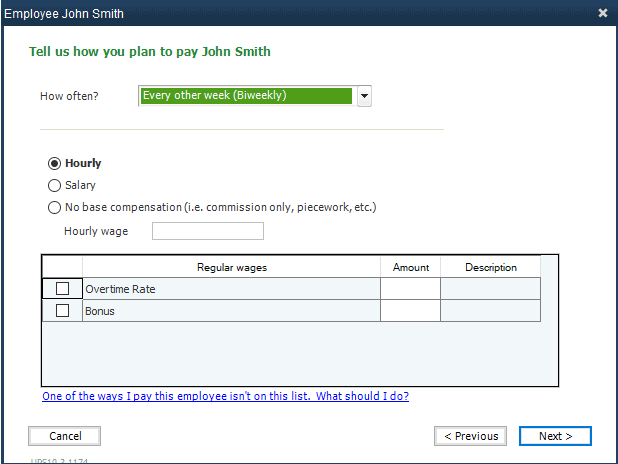
The input also should include how sick pay is calculated, how many hours of sick pay is allowed, when these hours start (for example at the beginning of every year), when will happen in case of unused sick hours, and current balances. The same way would be applied for vacation pay.
Direct Deposit
If your staff receive their pay through direct deposit, the next step is to enter the data for direct deposit. There would be up to two accounts per employee that can be set up with a direct deposit.
To allow your employees to receive their direct deposits, you also can provide them with prepaid cards through the setup tool. If you don’t choose to use this method, you can pay your staff with a paper check.
State Tax Withholdings
After setting information about direct deposit, you will need to answer some tax questions, for example:
-State subject to withholding
-Whether the employee used to live and work in another state before.
-State subject to withholdings
If you are afraid this step might be a bit confusing, don’t worry because QuickBooks has a “help menu” throughout the setup process, which will definitely make it much easier for users to do things correctly.
Federal and State Tax information
For this section, use the information provided in the employees’ W-4 to enter the filing status of each employee, extra withholding amounts, number of allowances, and other withholdings and credits.
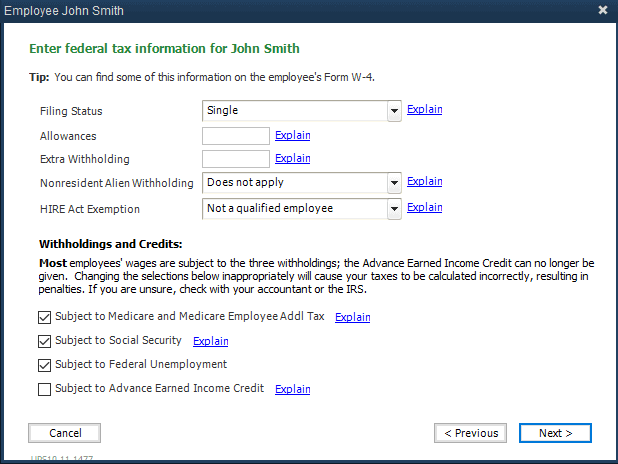
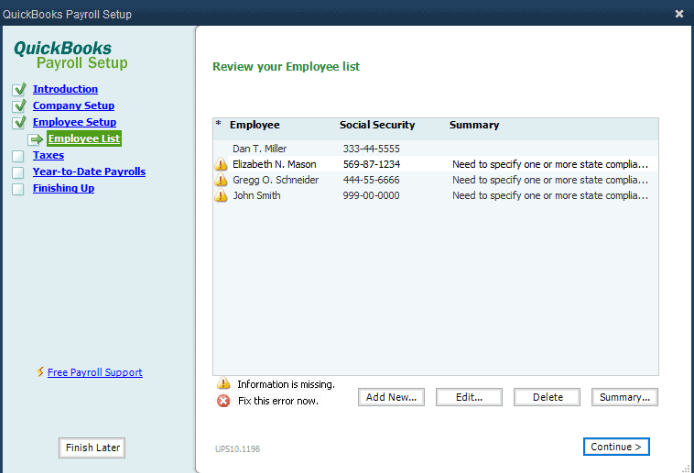
To wrap up this section, you will be able to save all the essential information of your employees, and your effort in keeping all this data can be shown when you need to look them up. Besides, a summary also appears in the Employee List.
If there is any error or missing information, it will appear on the Employee List for users to review and correct if needed. Since the summary section in the Employee List can specify the exact error, you do not need to figure it out by yourself and can save a great deal of time for other important steps.
Step 5: Set Up Payroll Taxes
Paying taxes is an integral part of any payroll setup. You can make this process less difficult by using QuickBooks Desktop to calculate and even pay your payroll taxes.
Federal Taxes
When coming to Federal Taxes, you may notice that QuickBooks set up several different taxes like federal withholding, social security, medicare, federal unemployment.
As the rates for those types of taxes are already set, there will be no need for users to worry about rates and numbers. However, you can't edit each type of tax, the expense account, or change how it is displayed on paychecks. In most cases, this section won't accept modifications.
State Taxes
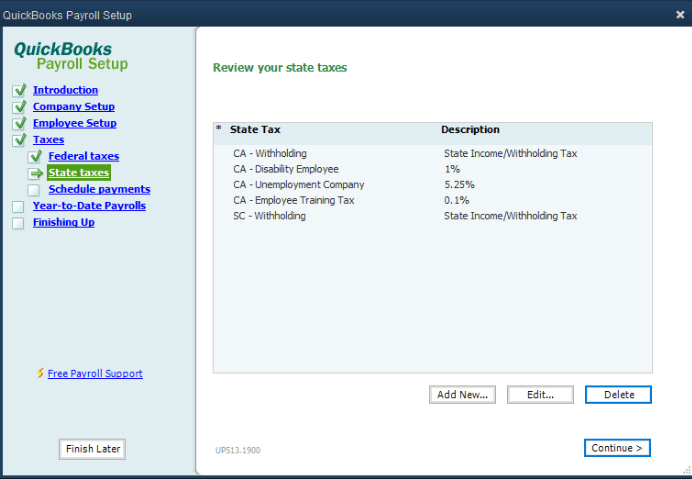
The next section we will talk about is State Taxes and unlike the previous one, at this stage, you have to make some edits although some state taxes are already set up for QuickBooks users beforehand, including state withholding and employee disability. The current rate will be shown in the description column like this:
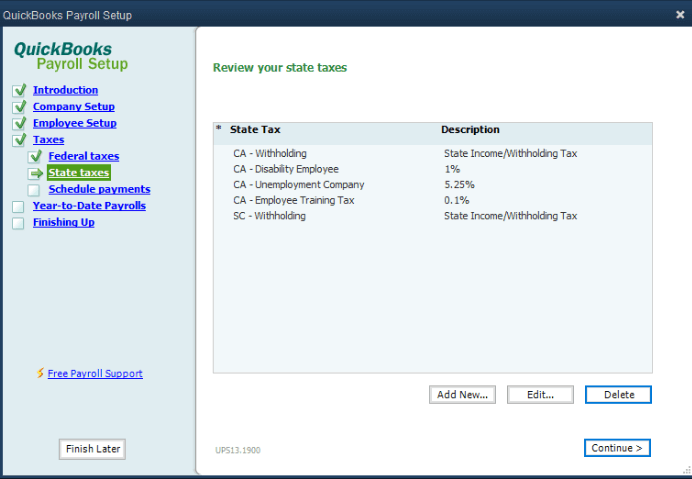
If you want to correct these rates, simply just need to click on the tax and change it by yourself. All you need to do is “Next” and create necessary changes. In addition, QuickBooks also provides further information for those who are unsure of the rates, they can click the link marked “Explain”. When all the changes have been made properly, save your modifications and go to the next step.
Scheduled Payments
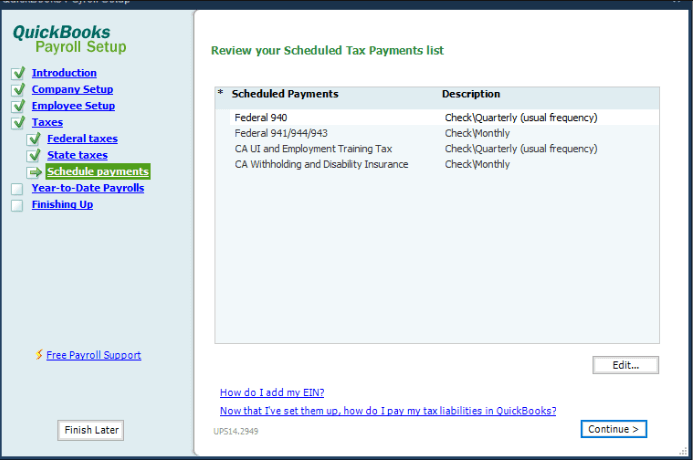
To set up your required tax payments, go to the Scheduled Payments column, you will see the types of payments are listed there. In the Description column, the frequency of payments can be edited by choosing the Edit option.
Step 6: Input Year-To-Date Payrolls
If it’s the first time you pay your staff, skip over this section. On the other hand, if it’s not your first time and you already had employees who have been paid in the current year then you should enter the year-to-date payrolls to ensure that paychecks and tax payments are correct.
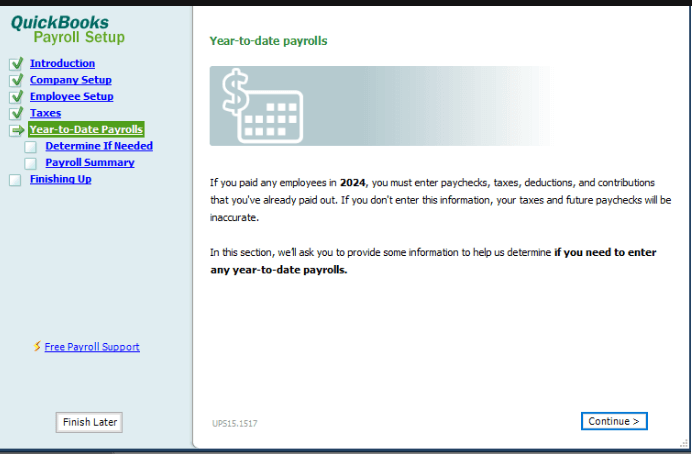
This section may take some time depending on how many employees you have to pay and the number of checks issued.
Luckily, QuickBooks provides thorough instructions right on the page, making the tool pretty simple to use. This step requires information such as the check date, check number, pay period, employee pay, and tax withholdings. For every employee who has got paid in the current year, their information should be filled in enough.
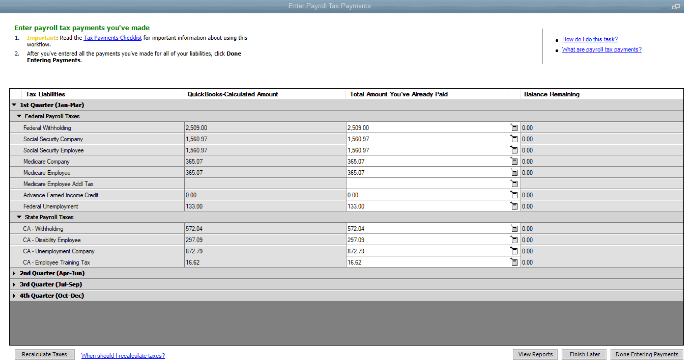
Finally, QuickBooks will make calculations for the amount you have to pay and compare it to the total amount you already paid, and let you see your remaining balance.
Step 7: Finish up and Prepare to Run Your First QuickBooks Payroll
Congratulations because you have done all the necessary steps above. If you fill in the accurate information then your payroll now is all set up and ready to go. At this point, you can run your first payroll and make any changes or additions if you wish to do so.
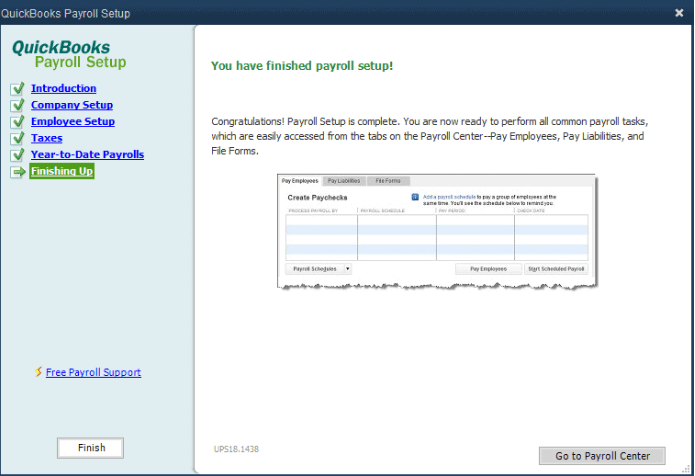
Although the setup process is pretty lengthy, it’s detailed and clear enough for any new user to understand how to set up QuickBooks payroll successfully. Make sure you take time and effort to enter all the important information in an accurate way so that your staff can get paid the correct amount on time and cause no problems related to taxes later.
Are you worried about doing this lengthy setup process all by yourself without any help? Don’t worry because you can conduct it effortlessly and smoothly thanks to 2 versions of the Quickbooks Integration extension from Magenest: Magento 2 Quickbooks Desktop and Magento 2 Quickbook Online. These tools will save a lot of your time and resources as all the steps could still be done automatically without any errors which are often caused by human involvement. Both versions have their own necessary features and customization services, find out which suits your business better via frequently asked questions.
Conclusion
We understand that running payroll at first can be a little confusing but after a while, you will surely find it simple and straightforward to utilize. We hope this article is of much help to you and help you know how to set up QuickBooks payroll. Leave us any questions about not only the topic today but also other eCommerce tools you want to discuss, visit our blog for more posts like this.


