

Table of Contents
Product images are an important visual element on the eCommerce stores as it not only provides further information about the products but also creates a good impression for customers right at the first time they visit. An appealing image fulfills the product description by illustrating all features in text into visualizations. In this way, conversion rates are increased remarkably.
Let's talk about image sizes. In Magento product images, thumbnail images,... etc can be resized easily for better visual experiences. It can also potentially increase the load speed of the website.
READ MORE eCommerce product images: Which is the best size?
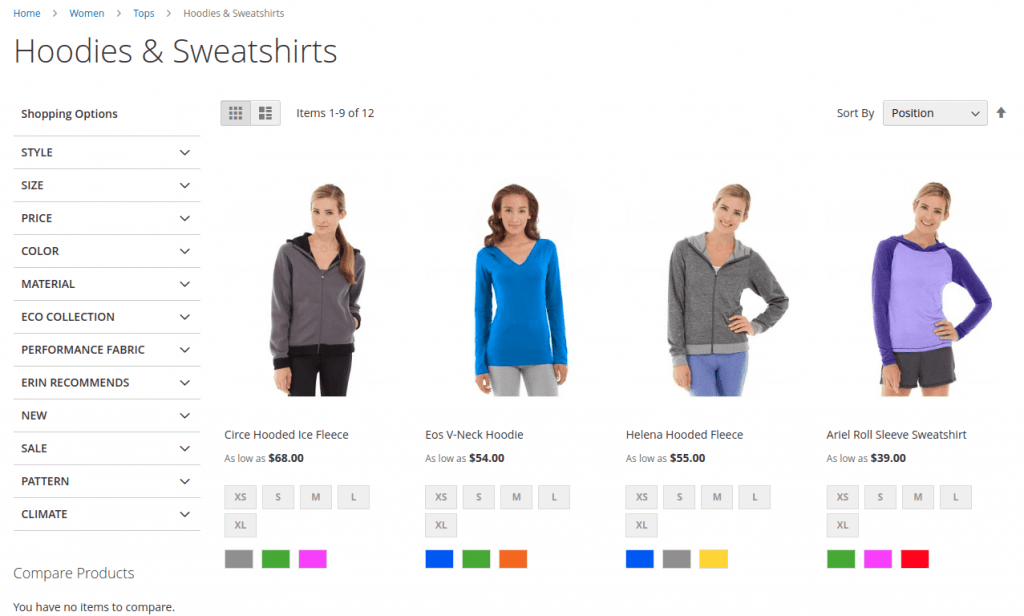
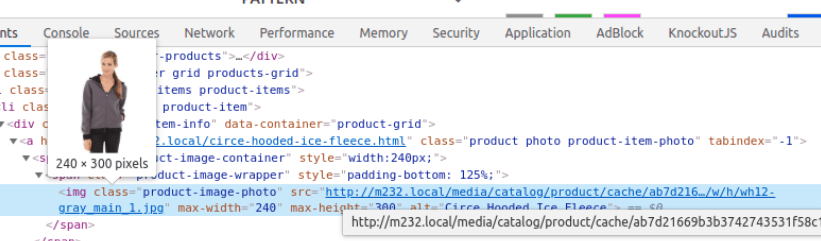
Let's say if you want to adjust the size of category grid product image to 300px x 450px (original: 240px x 300px) as below.
In this blog, We will show you how to change the product image sizes in Magento 2.
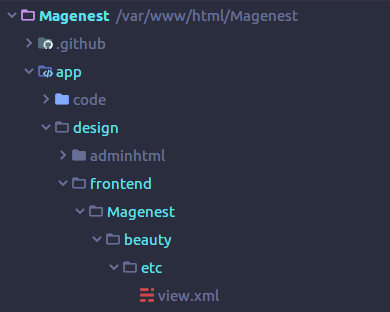
Step 1 - Find view.xml file
Almost all the configurations for product images are included in view.xml (includes width and height). Therefore, if you want to change resize product images in Magento 2, you need to adjust the view.xml file.
The conventional location of view.xml for a theme is <theme_dir>/etc/view.xml.
Eg: app/design/Magenest/beauty/etc/view.xml
If your theme doesn’t have view.xml file, simply find it at your parent theme etc/ folder and copy to your theme folder. This follows the fallback mechanism of Magento.
The location of view.xml is different depending on you are using Magento Blank theme or Magento Luma theme:
- Magento/Blank: vendor/magento/theme-frontend-blank/etc/view.xml
- Magento/Luma: vendor/magento/theme-frontend-luma/etc/view.xml
Magento doesn’t recommend override core’s code so you shouldn’t modify these files. It's better to copy to a new one in app/ folder to modify it.
Step 2 - Find the correct image id and type
In view.xml, image properties are configured in the scope of <images> element:
<?xml version="1.0"?>

<view xmlns:xsi="http://www.w3.org/2001/XMLSchema-instance" xsi:noNamespaceSchemaLocation="urn:magento:framework:Config/etc/view.xsd">
   <media>
       <images module="Magento_Catalog">
           <!-- Product images are configured within this element scope -->
           <image id="bundled_product_customization_page" type="thumbnail">
               <width>140</width>
               <height>140</height>
           </image>
           <image id="cart_cross_sell_products" type="thumbnail">
               <width>152</width>
               <height>188</height>
           </image>
           <image id="cart_page_product_thumbnail" type="small_image">
               <width>110</width>
               <height>160</height>
           </image>
           <image id="category_page_grid" type="small_image">
               <width>275</width>
               <height>275</height>
           </image>
           <image id="category_page_list" type="small_image">
               <width>275</width>
               <height>275</height>
           </image>
Each product image in Magento has an id and type properties. They are defined in <image> node inside view.xml:
<images module="Magento_Catalog">
	<image id="unique_image_id" type="image_type">
	...
	</image>
<images/>
Find your image unique id that contains the definition for the product image.
In our situation, the image id is <image id="category_page_grid" type="small_image"> .
TIP: To find the image id, find the node that has width and height exact as your output image. Say if your images is 700px x 700px . Find the node that has <width>700</width> and <height>700</height>
Step 3 - Configure product images in Magento 2
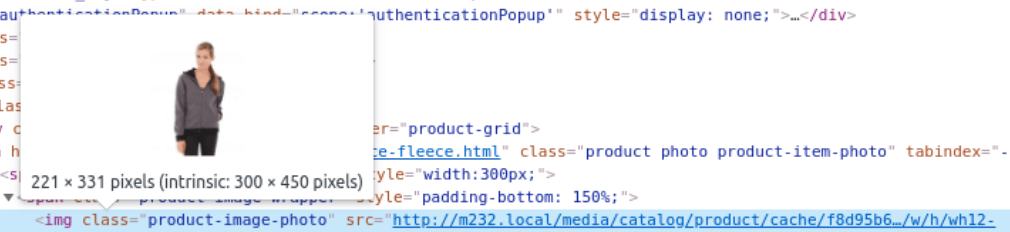
After you’ve found the element that contains the configuration for the product images, change the value of <width> and <height> node
<images module="Magento_Catalog">
    <image id="category_page_grid" type="small_image">
        <width><!-- Replace this with width in px : 300--></width>
        <height><!-- Replace this with height in px: 450 --></height>
    </image>
</images>
Step 4 - Clean the cache
Clean Magento cache in order to apply the configurations.
- You can go to System -> Tools -> Cache Management. Then click Flush Magento Cache button to clear Magento Cache.

- Or you can do this with the command line: php bin/magento cache:flush
In some cases, you would want to resize all images on your storefront so they are served immediately, which will speed up the page load on the first load.
Situations which this can be necessary might be:
- After you import products, which might have images of various sizes
- If image sizes were changed
- Image cache has been flushed
Run this command from Magento root folder: php bin/magento catalog:images:resize

After that, all of your category grid images have been resized.
Wrapping up
Magento provides many useful features to work with products and their images. Today we’ve learned to configure one of the most important features when it comes to products visual appearance.
Feel free to leave comments and ask any questions below. Stay tuned for more Magento 2 tutorials.

Joel Pham
Joel Pham is the CEO of Magenest, with extensive experience in eCommerce, business operations, and digital transformation. He has led projects for major brands across Magento, Shopify, Odoo, and enterprise technology solutions.
![How to create a new product type in Magento 2 [Step-by-Step]](https://store.magenest.com/blog/wp-content/uploads/2019/05/create-a-new-product-type-in-magento-2.jpg)
Weekly Trending
-

Customer Journey Map: Definition, Templates, and Examples
November 9 2020 -

Confirmation code: 5 things you need to know about it
March 30 2021 -

Which is the Top 8 Best Payment Gateway in India?
December 10 2023 -

How credit card processing works: What you should know?
November 18 2021 -

Best Store Locator Page Examples: Sell online & offline smarter
November 22 2019
Recent Posts
-

Payment Gateway Comparison - Top 5 Providers in 2026
April 1 2026 -

Magento 2 Stripe Extension: Installation & Configuration
December 29 2025 -
5 Best-selling Magento 2 Extensions to check out before 2026
December 19 2025 -

8 Best Magento Subscription Extensions For Online Businesses
December 8 2025 -

How to set up payment methods in Stripe Payment Gateway
September 21 2025

