

Table of Contents
Date fields are mainly needed when it is required to pick an unknown date in context for a specific event or schedule some plan. It doesn’t only reduce typing errors but also standardize the format. It also helps to improve the user experience by allowing users to simply select rather than inputting using the keyboard.
In this article, we will show you how to create a date field in Magento 2, especially in the custom form
Create date field in UI Component
In this code snippet, we will see how to add a date field in Magento 2 admin form using UI component.
The prerequisites:
- Set up module
- Set up table
- Set up 3 files: model, resourcemodel, and collection
- Set up controller and layout filet. In layout file, a reference to a file ui component is ui_component/my_form.xml
1. Create file content <routes>_<controller>_<action>.xml
Here is an example: magenest_myform_index.xml
<?xml version="1.0"?>
<page xmlns:xsi="http://www.w3.org/2001/XMLSchema-instance" xsi:noNamespaceSchemaLocation="urn:magento:framework:View/Layout/etc/page_configuration.xsd">
<body>
<referenceContainer name="content">
<uiComponent name="my_form" />
</referenceContainer>
</body>
</page>
2. Create the corresponding ui_component file named my_form.xml
3. Add sample code to my_form.xml
<form>
    ...
    <fieldset>
        ...
       <field name="start_date" formElement="date">
            <argument name="data" xsi:type="array">
                <item name="config" xsi:type="array">
                    <item name="options" xsi:type="array">
                        <item name="showsTime" xsi:type="boolean">true</item>
                    </item>
                    <item name="source" xsi:type="string">start_date</item>
                </item>
            </argument>
            <settings>
                <validation>
                    <rule name="validate-date" xsi:type="boolean">true</rule>
                </validation>
                <dataType>timestamp</dataType>
                <label translate="true">Start Date</label>
                <visible>true</visible>
                <dataScope>start_date</dataScope>
            </settings>
     </field>
 ...
    </fieldset>
    ...
</form>
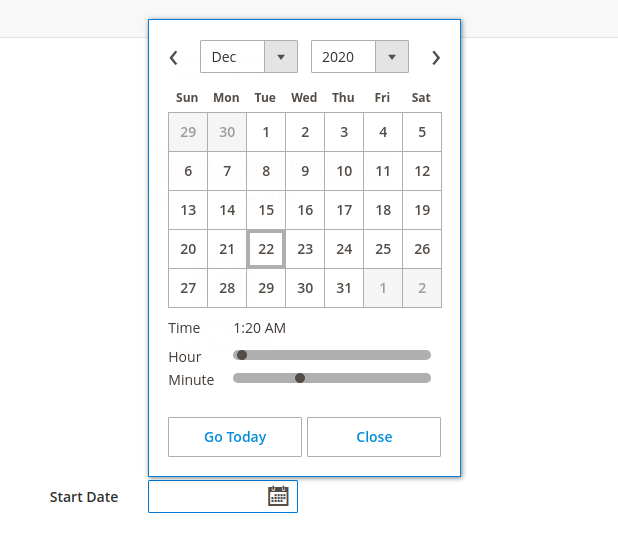
Once you add the code to the correct location, clean the cache and your date field will begin to show up where you set it:
Initialize the calendar widget
1. Create a template file (.phtml)
2. To show the date field, first of all, we need to add the field name as “example-date”
<div class="field">
    <label>Date : </label>
    <input type="text" class="input-text" id="example-date" style="width: auto" name="example-date" />
</div>
Now, we can simply add Javascript code after the for the end tag:
<script>
  require([
    'jquery',
    'mage/translate',
    'mage/calendar'
    ], function ($, $t) {
      $('#example-date').calendar({
        changeMonth: true,
        changeYear: true,
        showButtonPanel: true,
        currentText: $t('Go Today'),
        closeText: $t('Close'),
        showWeek: true,
    showOn: "both",
         showsTime: true
      });
    })
</script>
- showOn: when the datepicker should appear. The datepicker can appear when the field receives focus ("focus"), when a button is clicked ("button"), or when either event occurs ("both").
- showsTime: show with the time if you need it
Most options, methods, and events for the calendar widget correspond to the jQuery Datepicker Widget options.
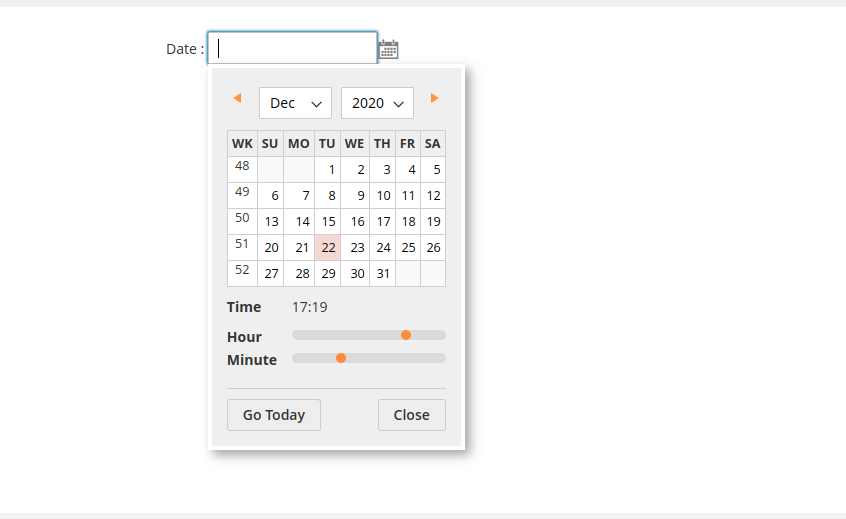
Here is the result:
Create date field in Magento 2 Configuration Section Using system.xml
1. Create system.xml file in app/code/NameSpace/ModuleName/etc/adminhtml
<config xmlns:xsi="http://www.w3.org/2001/XMLSchema-instance" xsi:noNamespaceSchemaLocation="../../../Config/etc/system_file.xsd">
    <system>
        <section id="yoursectionid" translate="label" type="text" sortOrder="10" showInDefault="1" showInWebsite="1" showInStore="1">
            <label>Custom Label</label>
            <tab>tab name</tab>
            <resource>NameSpace_ModuleNmae::config_modulename</resource>
            <group id="general" translate="label" type="text" sortOrder="1" showInDefault="1" showInWebsite="1" showInStore="1">
                <label>General Settings</label>
                <!-- date field code start-->
                <field id="start_date" translate="label comment" sortOrder="4" type="text" showInDefault="1" showInStore="1" >
                    <label>Start Date</label>
                    <!-- here we pass class where we create date picker-->
                    <frontend_model>NameSpace\ModuleName\Block\DateField</frontend_model>
                </field>
                <!-- date field code end-->
            </group>
        </section>
    </system>
</config>
2. Create app/code/NameSpace/ModuleName/Block/DateField.php where we create date field element
<?php
namespace NameSpace\ModuleName\Block;

class DateField extends \Magento\Config\Block\System\Config\Form\Field
{
   public function render(\Magento\Framework\Data\Form\Element\AbstractElement $element)
   {
       $element->setDateFormat(\Magento\Framework\Stdlib\DateTime::DATE_INTERNAL_FORMAT);
       $element->setTimeFormat('HH:mm:ss'); //set date and time as per your need
       $element->setShowsTime(true);
       return parent::render($element);
   }
}
There are four date formats to use:
- DATETIME_INTERNAL_FORMAT: yyyy-MM-dd HH:mm:ss
- DATE_INTERNAL_FORMAT: yyyy-MM-dd
- DATETIME_PHP_FORMAT: Y-m-d H:i:s
- DATE_PHP_FORMAT: Y-m-d
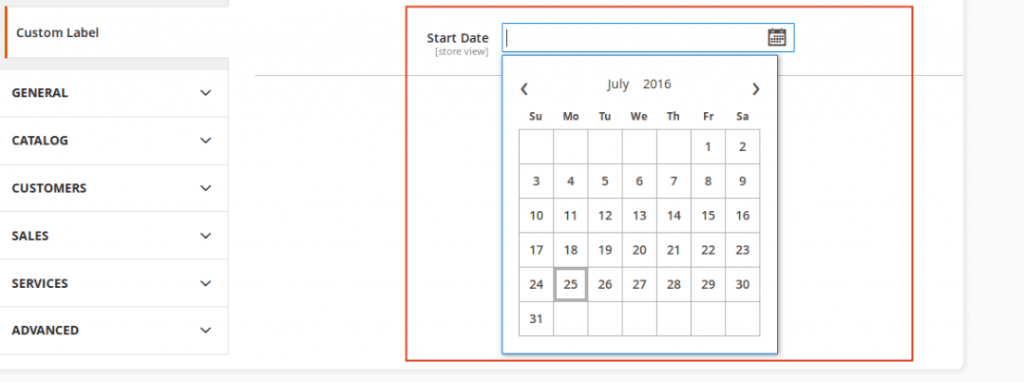
This datepicker element will be shown under store configuration as following:
Thank you for reading!

Joel Pham
Joel Pham is the CEO of Magenest, with extensive experience in eCommerce, business operations, and digital transformation. He has led projects for major brands across Magento, Shopify, Odoo, and enterprise technology solutions.


Weekly Trending
-

Confirmation code: 5 things you need to know about it
March 30 2021 -

Customer Value and Satisfaction: What's the Difference?
October 30 2020 -

Which is the Top 8 Best Payment Gateway in India?
December 10 2023 -

Social sharing 101: Its Definition, Benefits & Examples
December 11 2020 -

Customer Journey Map: Definition, Templates, and Examples
November 9 2020
Recent Posts
-

Payment Gateway Comparison - Top 5 Providers in 2026
April 1 2026 -

Magento 2 Stripe Extension: Installation & Configuration
December 29 2025 -
5 Best-selling Magento 2 Extensions to check out before 2026
December 19 2025 -

8 Best Magento Subscription Extensions For Online Businesses
December 8 2025 -

How to set up payment methods in Stripe Payment Gateway
September 21 2025

