
Table of Contents
If you own a business, you must already know the importance of getting paid. You have to rely on your clients to ensure you are paid on time and have enough money to invest in your business and pay for your employees. If you used to work for someone else then you know that employees always want to get their wages on time. In fact, paying your staff late is a bad work ethic no matter what the field is. Sometimes it even leads to fines and other legal consequences and you never want that to happen.
Fortunately, nowadays ensuring that your staff always are paid on time has been made easier than ever thanks to accounting software to boost payroll capabilities. And one of the big names out there is QuickBooks Online. Today millions of business owners have relied on QuickBooks Online to help them balance the books, track inventory and perform many other tasks like payroll.
In this article, we are going to discuss how to do payroll in QuickBooks online in step-by-step. We will break down each step so that it will be very easy to follow, from signing up, setting to running payroll through QuickBooks Online, all are made easy for you. There wouldn’t be any prior experience needed!

What Do You Need to Run Payroll in QuickBooks Online?
Before sitting down and getting started, there are a few materials you need to prepare to set up and run payroll successfully and accurately through QuickBooks Online. And why do we need each of these items below? You will find the answer in the next section since we will break down exactly when and how to use them.
- Personal Information of employees
- Employee Deductions
- Employee Pay rates
- Employee W-4s
- Business Bank Account Login information
- Direct Deposit Authorization Forms and Voided Checks
- Basic information about your company
Apart from setting up payments through QuickBooks for each employee, you could also take a few additional steps to ensure your payroll taxes are calculated and paid correctly. For this kind of task, you will need to have the following information besides all the items that are listed above.
- State Account and Withholding numbers
- Federal EIN
- Workmen’s Compensation Policy information
How to Set Up Payroll in QuickBooks Online?
Once you have gathered everything necessary for this step, it’s about time to set up your payroll with QuickBooks online. Depending on the number of workers in your company, this process can take more time so be prepared and ready to take longer than you need to input everything accurately.
Although these steps below can take some time to complete for each staff member, the good thing is it’s all very straightforward and simple to proceed even if you have never set up payroll before.
Step 1: Sign Up for Payroll
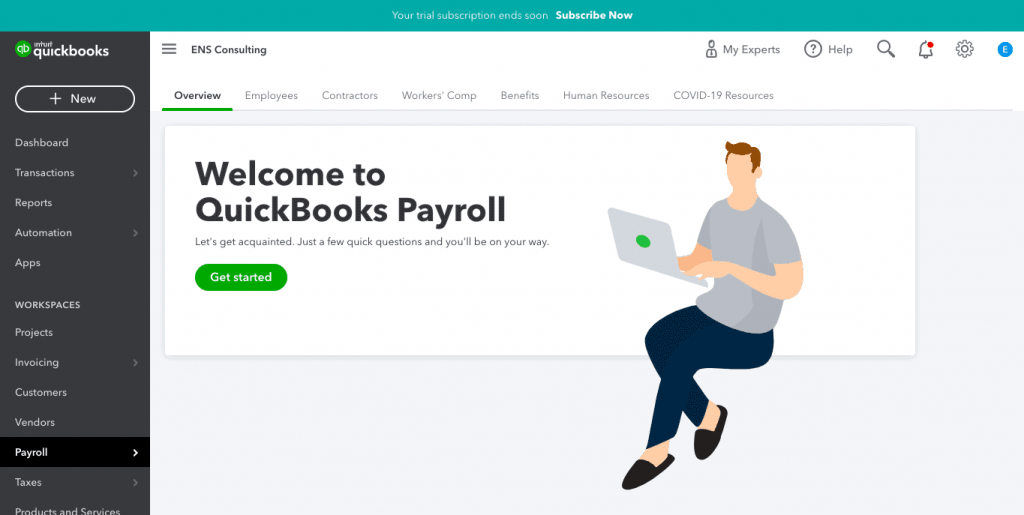
The very first step to do is to sign up for QuickBooks payroll online. This is supposed to be easy and can be done right from your dashboard. From the menu on the left side of your screen, choose Payroll and from here, you can decide whether to set up payroll for your employees, workers' comp, or contractors. In this article, we will click the Employees option to stick with our original purpose.
Next, select a QuickBooks Payroll subscription plan and from this point, you can choose either various features to get a plan recommendation from QuickBooks or your own plan. The price of plans will range from $45-$125 per month plus $4-$10 per month for each employee. QuickBooks users are eligible for a 30-day free trial before making any commitment.
Step 2: Input Basic Information to Set Up Payroll
There are a few basic questions you have to answer related to your business to set up payroll, such as:
- Have you paid your employees in 2024?
- When would be your next payday?
- What is the primary location of the workplace?
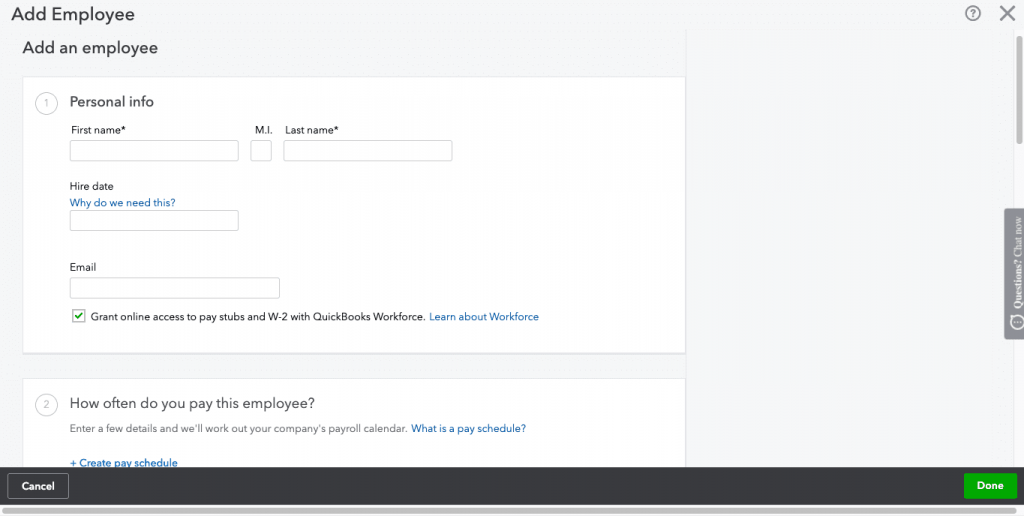
Step 3: Add employees
Now it’s time to use all the employee information you have prepared so you can set up payroll and pay them on time. After dealing with all the questions about your company, next, you are prompted to do add employees. These will include personal information, pay rate, deductions, withholdings, personal details, and payment details.
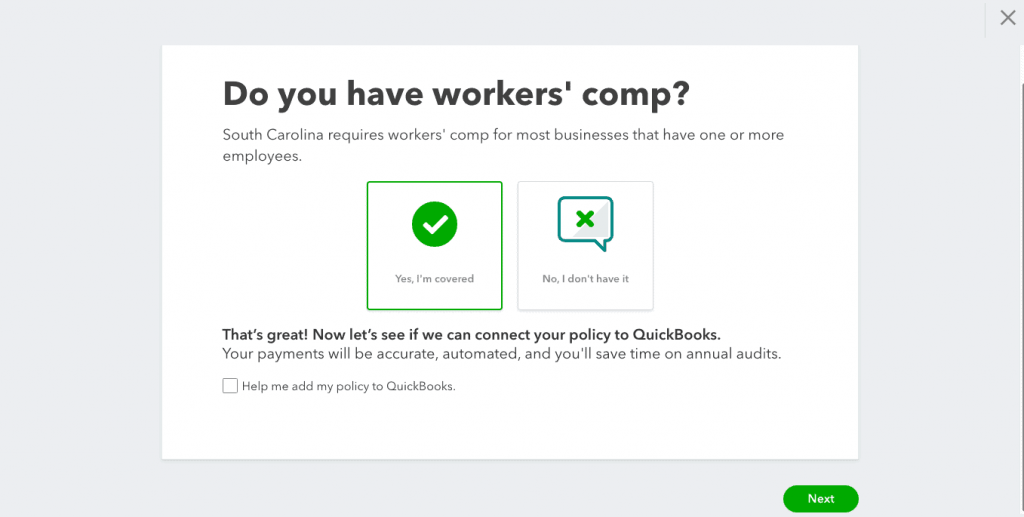
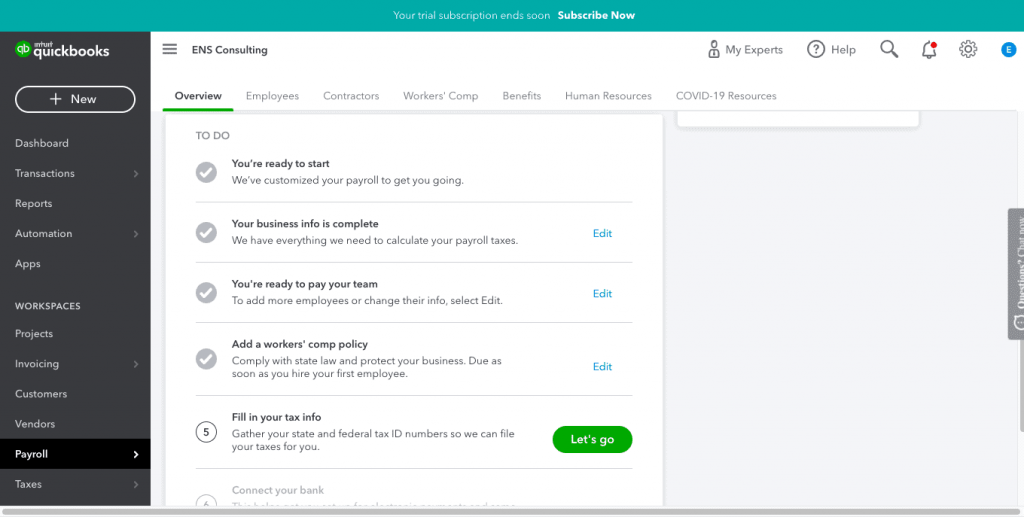
Step 4: Add Workman's Comp Policy Information
In this step, you need to add your workman’s comp policy to the QuickBooks Online and if you don’t have a policy yet, QuickBooks will help you find one or you can choose to do it at a later time.
Remember you must fully understand the workman’s comp laws in your region and follow its rules. In case you don’t have a policy or you are not sure about the laws in your area, don’t hesitate to consult the problem with an attorney, CPA, or an insurance agent to learn more and avoid mistakes if possible.
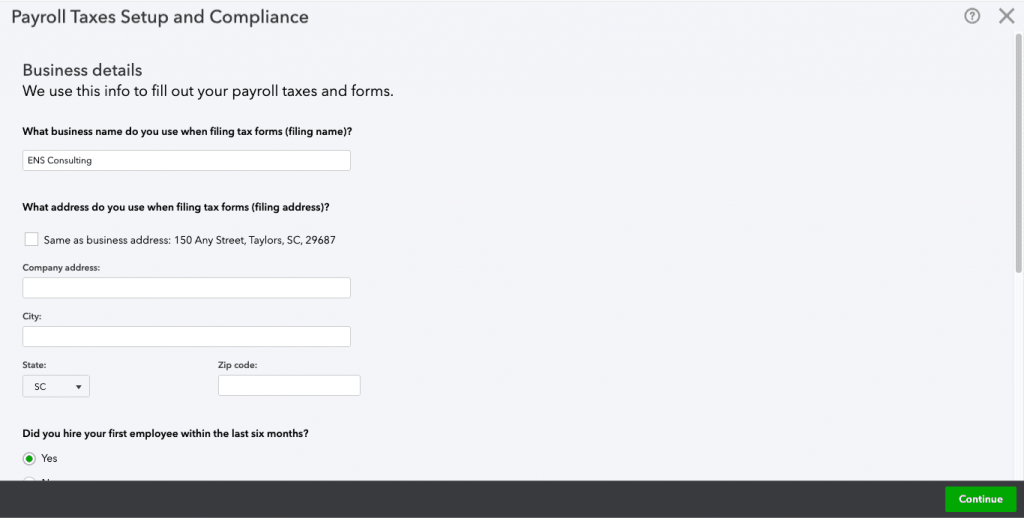
Step 5: Set Up Payroll Taxes
Enter your filing name and filing address like what appears in the picture below, along with answers to questions such as:
- Did you hire your employee within the last 6 months?
- What is your company type?
- Did you buy your business from someone else?
- Is your business a non-profit?
- What is your Principle Officer Title?
There are numbers you need such as Federal EIN, State Withholding number, State Account number. If you don't have them yet, then you may skip this step temporarily and come back later to add the information.
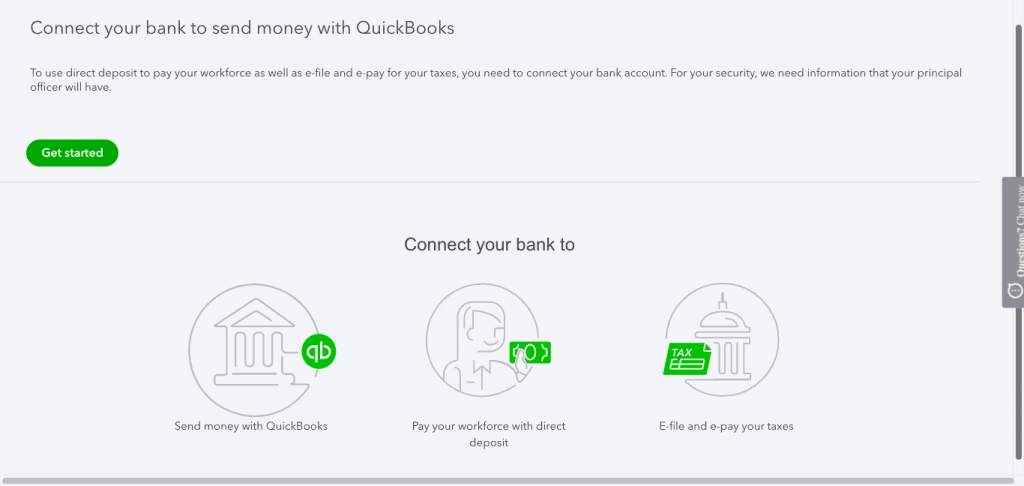
Step 6: Connect Your Bank Account
If you pay your employees via direct deposit, add the information of your bank account to QuickBooks to send payments, e-files, and pay taxes online.
Step 7: Sign Your Tax Forms
Although this step is not compulsory, there’s no harm in taking a few extra minutes to sign the tax forms. This allows you to be more prepared when the tax time comes.
Don’t worry that you may get confused at any point in the setup process because QuickBooks payroll makes it very easy for its users to stay on track. Now, let’s go discover how to do payroll in QuickBooks Online successfully with only 6 steps.
How to do Payroll in QuickBooks Online in 6 steps
After you have everything set up, we can start running payroll. The rest of the process is relatively simple particularly if you take advantage of the automation. Here are 6 steps of how to do payroll in QuickBooks Online:
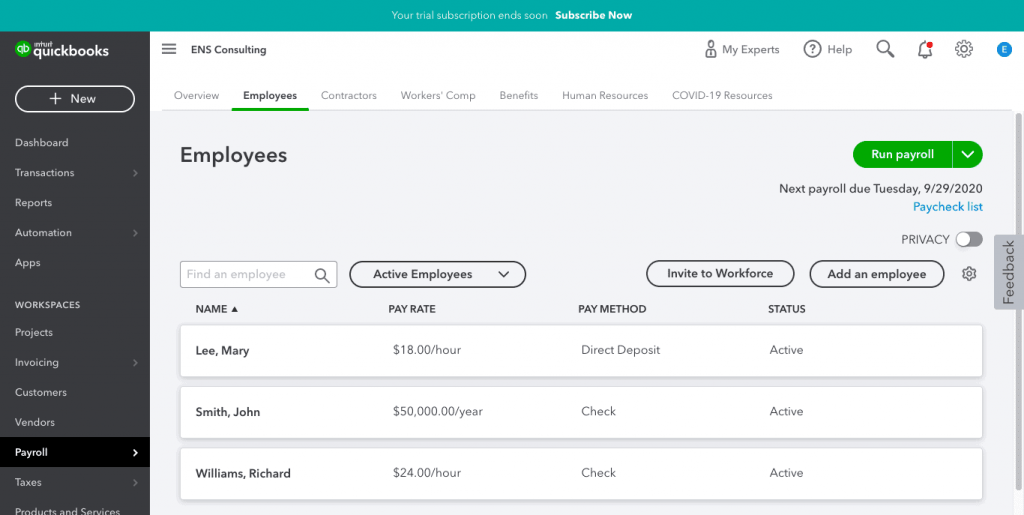
Step 1: Confirm Employee Information
First, you need to click on the Payroll tap in the sidebar to start running your payroll, then select the Employee tab on the top of the screen where you can see the name of each employee, their pay rates, pay method, and employee status. This screen will allow the employee’s name to be edited if necessary. You could also add a new staff member in this step.
Once you confirm all the information on the screen of step 1, just need to click the green button “Run Payroll” on the right corner at the top.
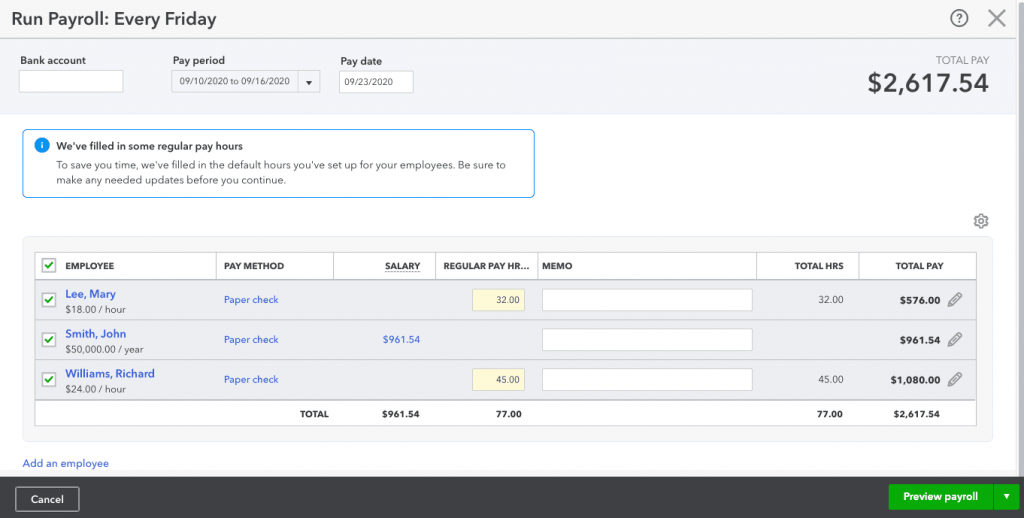
Step 2: Salary, Hours, and Memos
In the second step, QuickBooks Online requires you to confirm additional details to make sure the pay rate is accurate for each employee. If you already enter the daily hours and working days per week, you can see that QuickBooks has done the rest for you, here will be the total number of hours calculated. You can make any changes if this is not accurate.
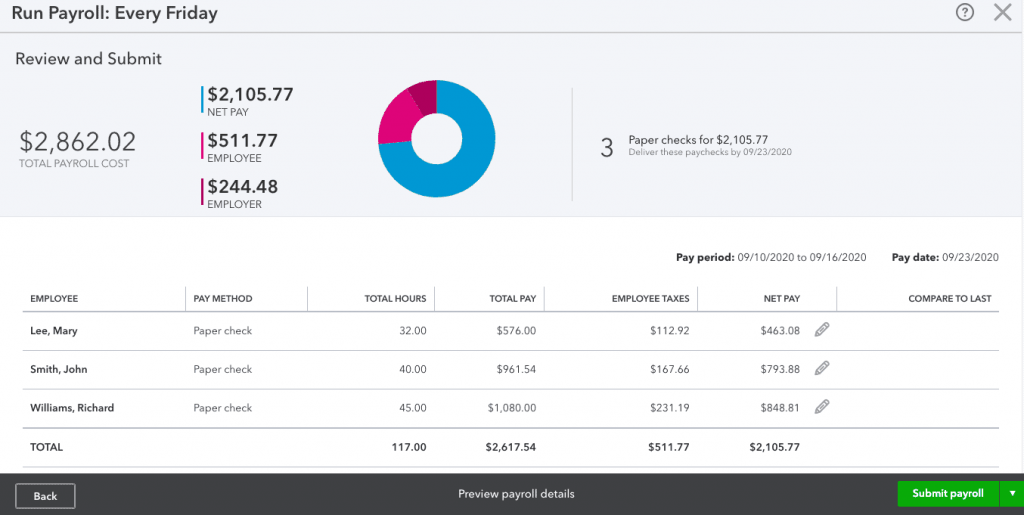
Step 3: Preview Payroll
To preview payroll, select the “Preview payroll” button right at the bottom of the screen and you will quickly see an overview of it. This table consists of payroll costs which will be broken down by employee costs, employer costs, and net pay. Besides, other information such as the number of payments in total, types of payments, and delivery date are also shown on the screen.
When you run payroll a few times, you will be able to see a comparison of totals with the last time you run payroll.
Step 4: Submit or Save Payroll
This is an important step that deserves extra attention because you can pay your employees now. At this point, you can either choose to pay now or save the payroll and pay later. The latter option is suitable if you’re still missing some information about your employee or need to make some changes. Of course, if everything is right and you are confident, it’s time to run payroll.
To complete the process, simply click “Submit payroll”. If your employees get paid via direct deposit, the money will be deducted from your account and go to the employee’s bank account. If they are paid via paper check, you can review and print each check before emailing or giving them to your workers. This way enables you to check and compare if there are any misunderstandings happening later.
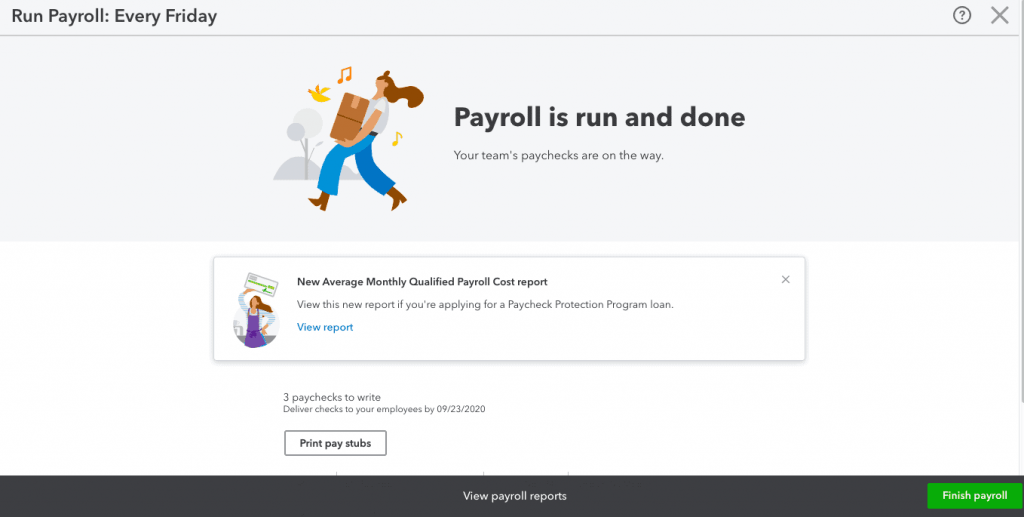
Once everything is done, “Finish” is a good button to go and you will go back to your QuickBooks dashboard.
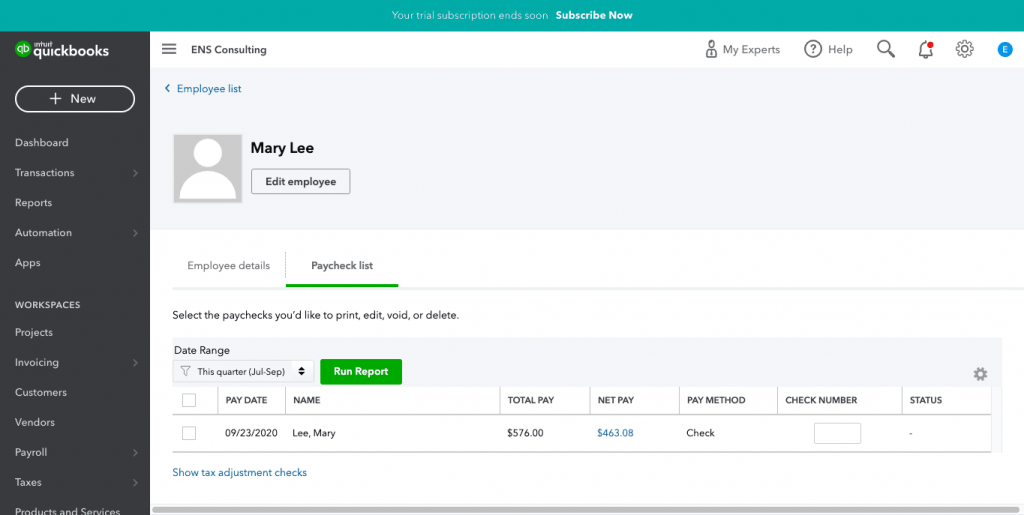
Step 5: Fix Errors or Reprint Checks
So, what if you thought everything was right but suddenly realized a few mistakes after clicking “Submit”? There’s no need to worry because you can always view your paychecks and make some corrections or even delete things. You just have to go back to the Payroll tab where you can select “Employees” and edit their information, either rewrite, delete or reprint.
Step 6: Use Automation for the Process
This step is worth waiting until now to be read because we are going to tell you one great news is that processing payroll could be even easier. QuickBooks allows you to automate payroll, therefore, you will not need to remember each step and go through it every time the payday comes near.
However, the bad news is that not every task can be handled automatically. According to QuickBooks, Auto Payroll is not available for all customers, and in order to use its automatic function, you have to meet several requirements below:
- You can’t run Auto Payroll on your first payroll.
- All employees have to be paid.
- The setup for Payroll must be completed.
- No holds on your account
Once you can meet those requirements, you can easily turn the Auto Payroll on in the setting and start enjoying it.
QuickBooks will send you a summary of your payroll a few days prior to the payday so you have all the time you need to go over and make necessary changes before the deadline set by QuickBooks. If not, funds will be automatically deducted from your account and go to your employees’ according to the payment schedule that you set up. The Auto Payroll function can be switched off any time you want it to be through the Payroll Setting tab.
All in all, while this might seem a lot to learn at first, the process is actually quite simple and not as time-consuming as you may think.
Now you may have the answer to why QuickBooks Online has been used widely and helps thousands of vendors to get better financial management, all thanks to its easy-to-use feature, automatic update, and time-saving advantages. What’s even greater is that QuickBooks Online can be easily integrated with your Magento 2 store, you just need to check it out and enjoy the amazing benefits the extension brings to your business.
Conclusion
QuickBooks Online is a powerful tool to save your business from a heavy workload which is to pay your employees on time without making any mistakes. In fact, today with the assistance of QuickBooks Online, running your payroll has become easier than ever. We hope this article has shown you exactly how to do QuickBooks payroll Online. If you have any questions, just leave a comment below, we are always happy to provide our support. Our blogs still have tons of useful and interesting posts like this, go find them out by yourself! We are sure you can find excellent solutions to boost the revenue of your eCommerce store rapidly!

Joel Pham
Joel Pham is the CEO of Magenest, with extensive experience in eCommerce, business operations, and digital transformation. He has led projects for major brands across Magento, Shopify, Odoo, and enterprise technology solutions.


Weekly Trending
-

Confirmation code: 5 things you need to know about it
March 30 2021 -

Customer Value and Satisfaction: What's the Difference?
October 30 2020 -

Social sharing 101: Its Definition, Benefits & Examples
December 11 2020


Recent Posts
-

Payment Gateway Comparison - Top 5 Providers in 2026
April 1 2026 -

Magento 2 Stripe Extension: Installation & Configuration
December 29 2025 -
5 Best-selling Magento 2 Extensions to check out before 2026
December 19 2025 -

8 Best Magento Subscription Extensions For Online Businesses
December 8 2025 -

How to set up payment methods in Stripe Payment Gateway
September 21 2025

